The most important embroidery stitches for beginners
Some stitches are more important than others. They make life easier, and they are highly functional. Before I share the top 3 stitches that will give you freedom in design choices, watch the video with beginner details: how much thread to use, how to divide strands, how to thread a needle, and how to make a knot.
Now to my top 3 hand embroidery stitches:
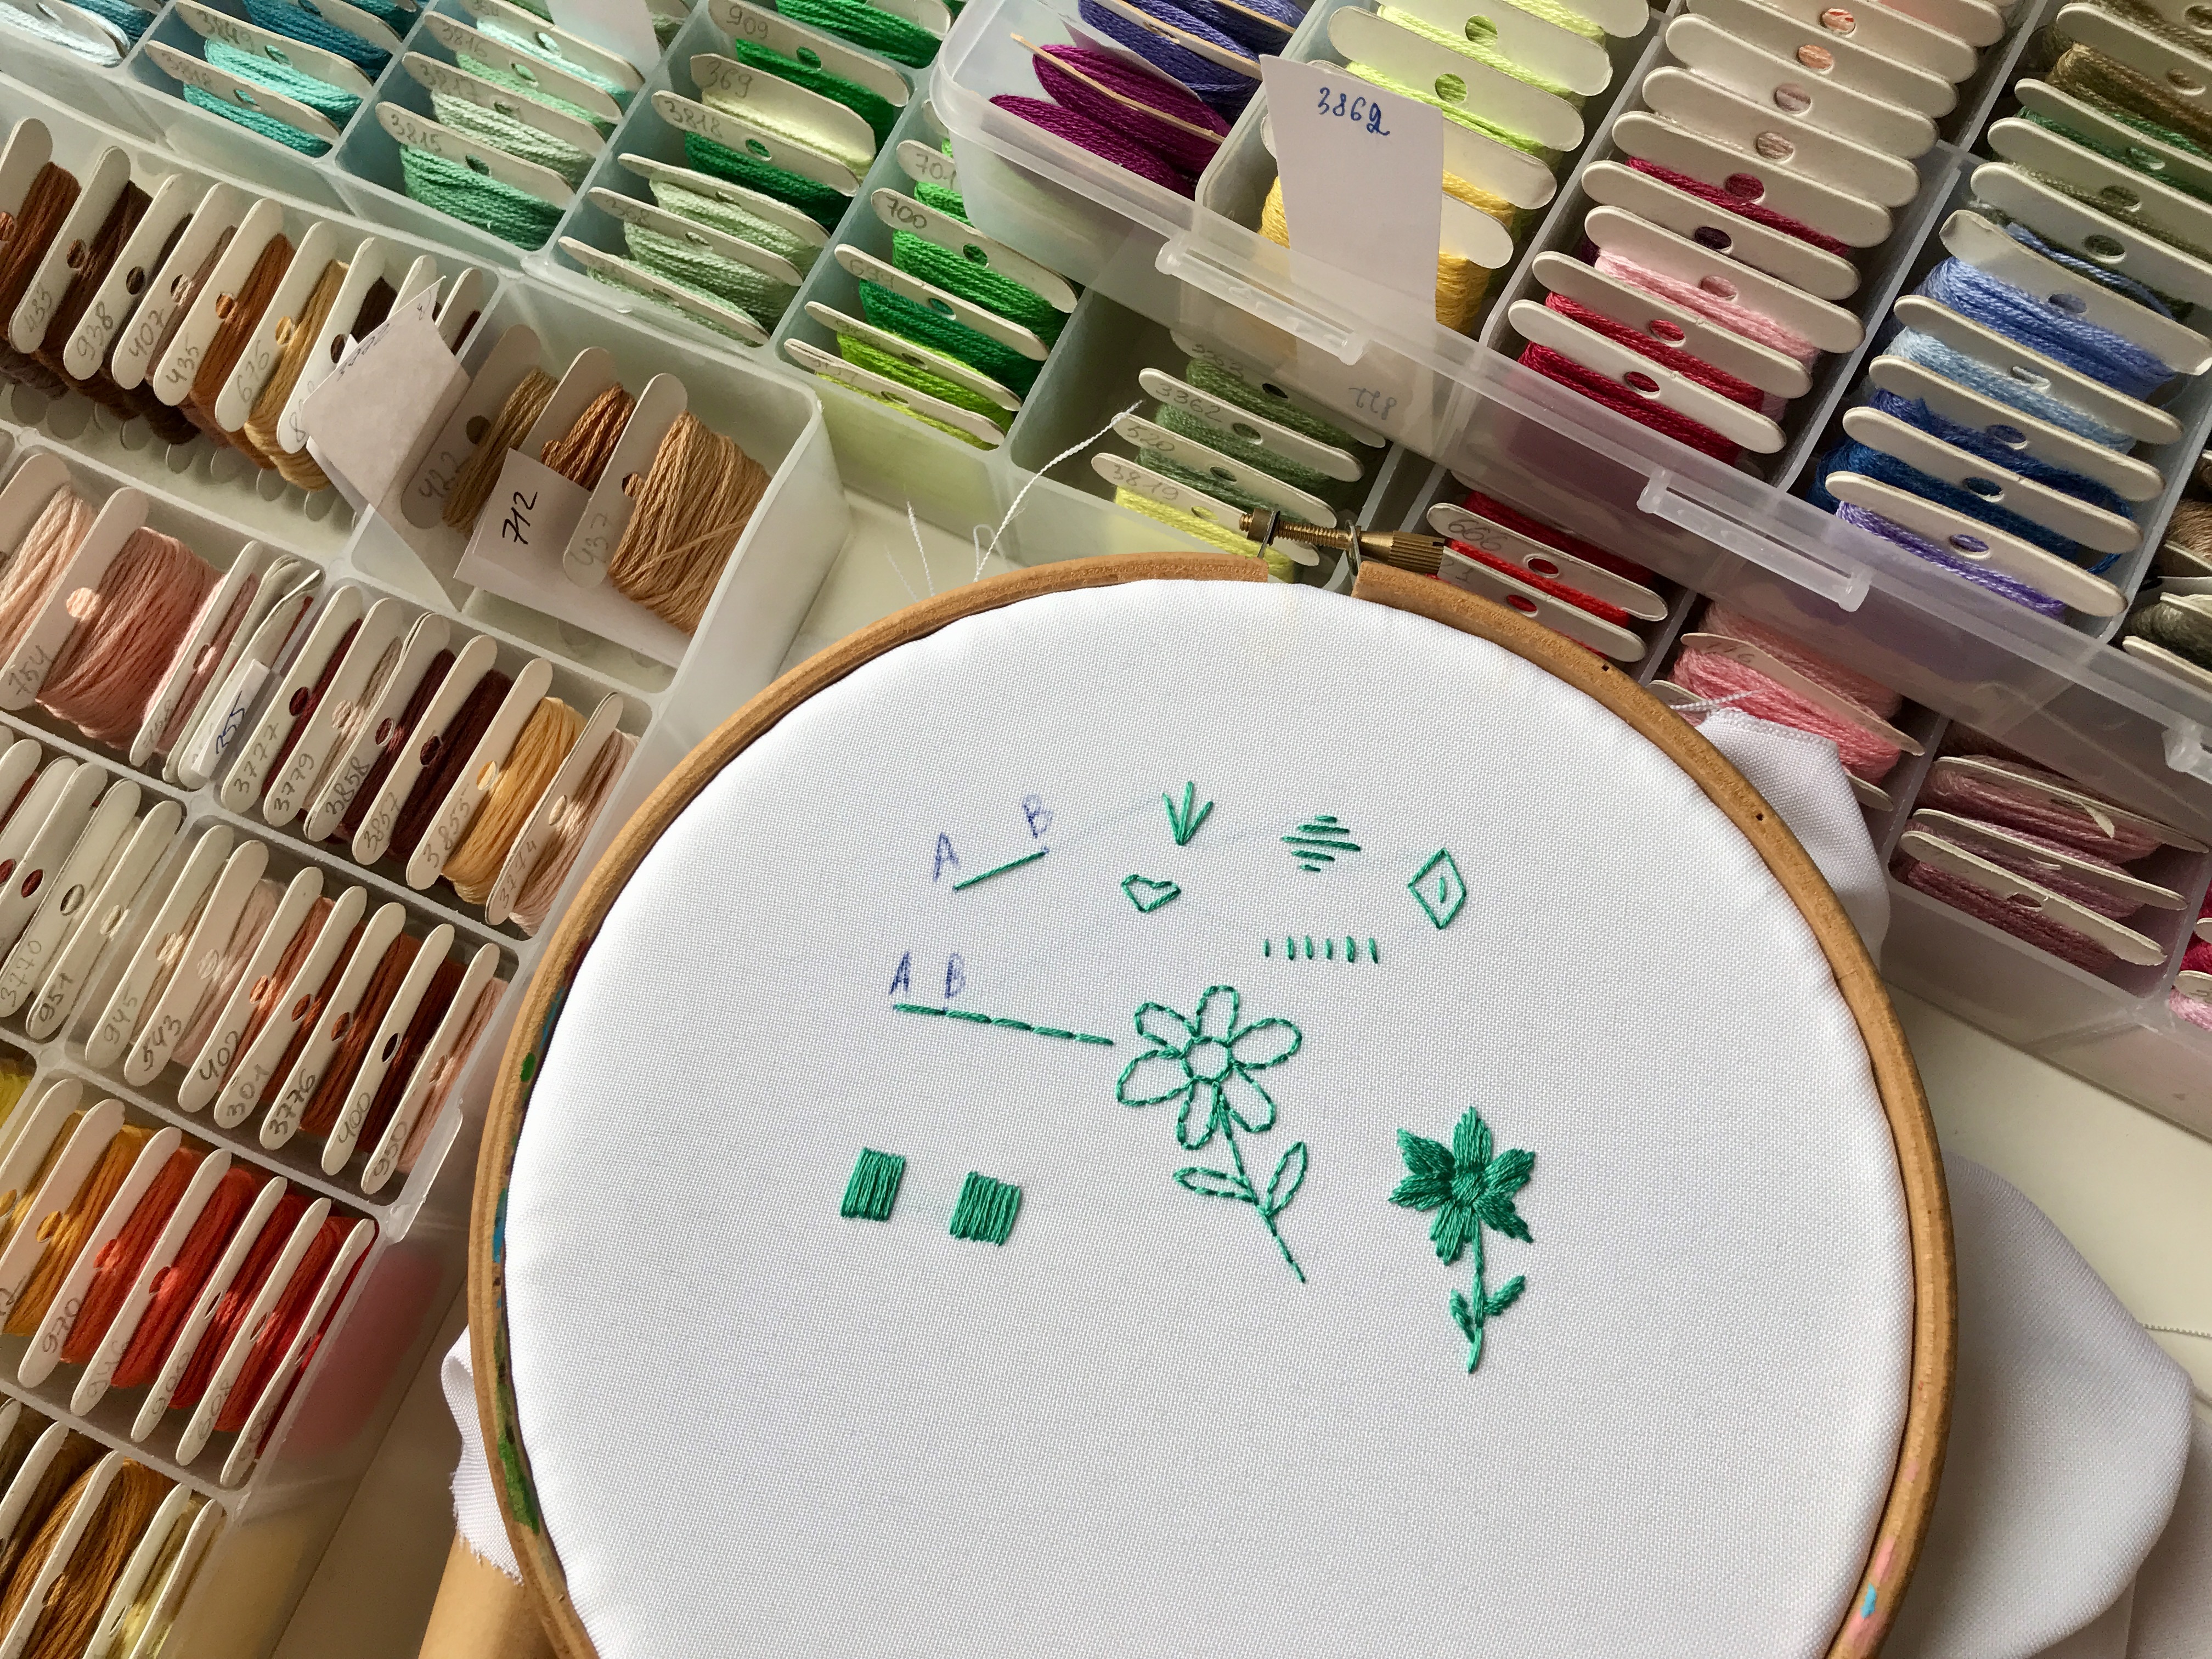
Straight stitch
The mother of all stitches, in my opinion. It’s easy - you come up to point A and come down to point B. But how many possibilities does it give you?
You can arrange them in groups, you can make simple leaves and flowers, or geometric designs. Straight stitches shouldn’t be too long, or they may get snagged or loose.
Back stitch
Make lots of straight stitches in a row, and you can call it a backstitch. Okay, there’s a little more to it. Bring your needle up and down to the left (not to the right as you did with a straight stitch) come up again to the right at the stitch distance. Then back down near the previous stitch and so on, to direct each stitch “back” towards the line of the growing backstitch.
That’s the difference.
Backstitch opens the door to the new world. Now you can outline! It means a lot! And you can make rows of backstitch, starting each new row near the middle of the previous row stitch. It’ll give you brick stitch and the possibility to embroider lettering.
That’s what I did with backstitch and straight stitch.
Satin stitch
This stitch is for filling shapes, but also good for lettering.
Always keep the area you are embroidering in a fabric hoop. This will keep the fabric tight and flat while you work.
And make rows of straight stitch very close to each other. You can always start from below - this will be a double-sided satin stitch. Because you’ll cover the area on the back too. You will be spending as much thread on the back side as you do on the actual side of the fabric. And the back will look almost like the front side.
Or alternate - it will be … Yes! One-sided satin stitch. It saves thread, but harder to make.
Practice the satin stitch until you can pull the threads tight enough to lie flat, but loose enough that they don't distort the shape of the cloth. Stitching too tightly is a common mistake. Try to use a consistent tension for each stitch, or you'll have loose threads. The tension of your stitches should be the same as the tension of the fabric.
Knowing these three, you can embroider any design. Remember, always secure your thread. Don’t know how? Watch my video