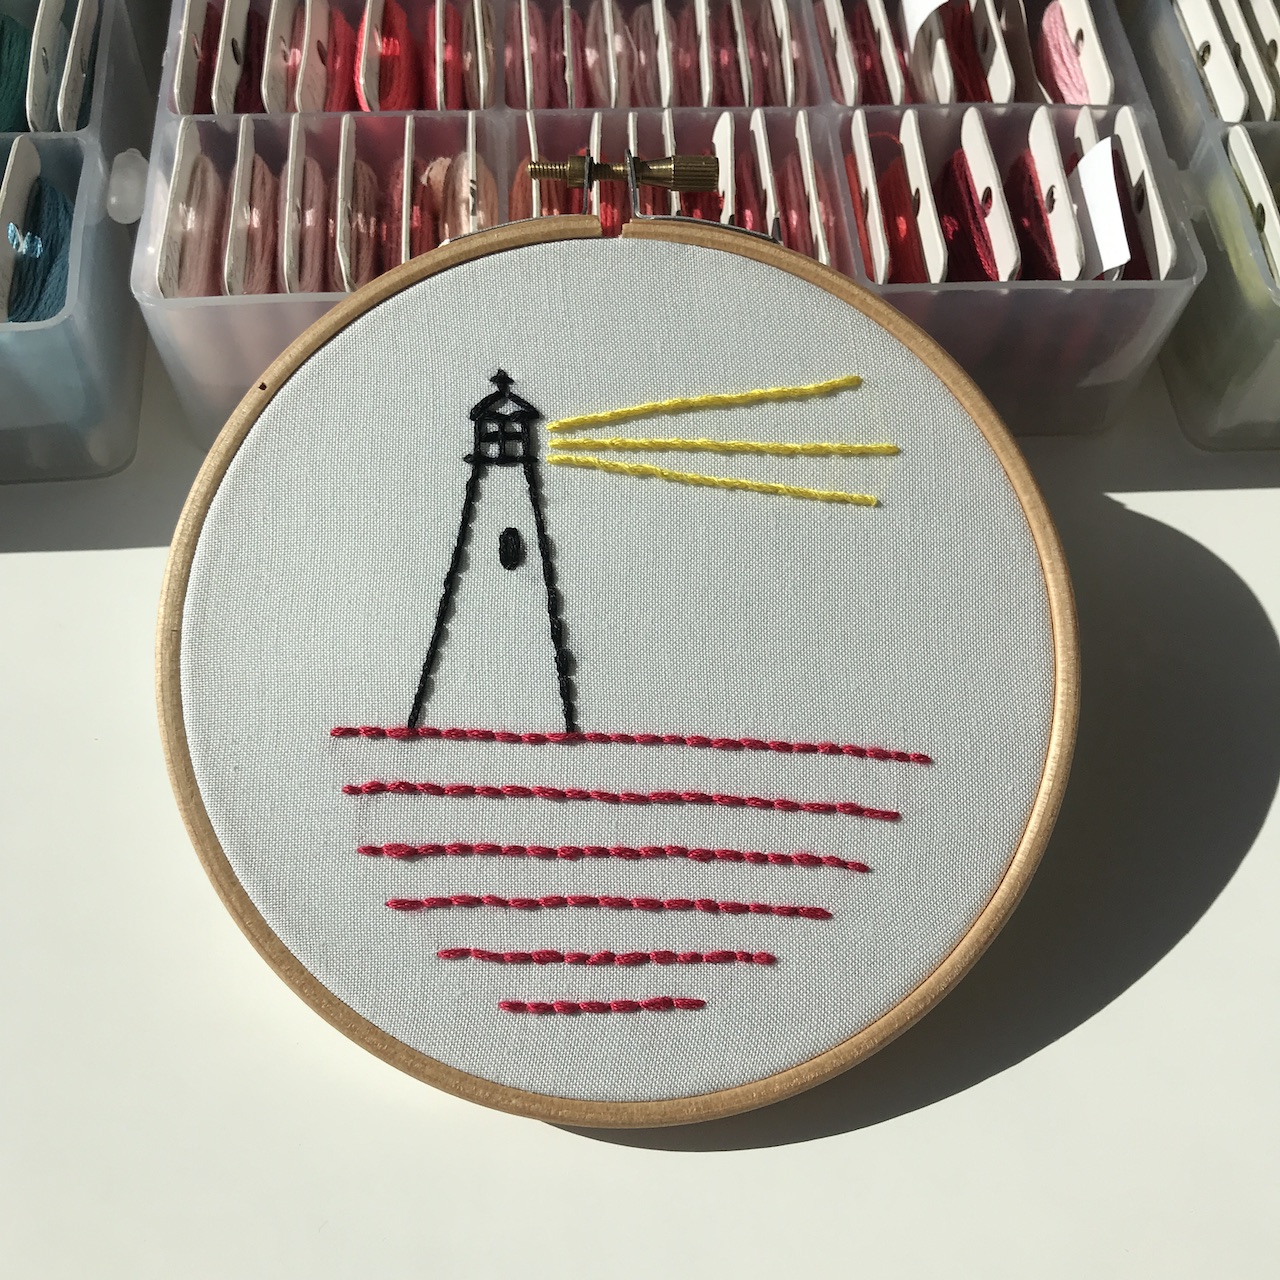
How to transfer an embroidery pattern
Why transfers go wrong
- the wrong method for the fabric, or
- too much/not enough pressure while tracing.
4 rules to follow
- Test first. Mark a scrap of your fabric and remove it the same way you’ll remove it later (water, heat, erasing, rinsing, etc.).
- Keep lines light. Your stitches are the final drawing; heavy lines can peek through.
- Match method to fabric. Smooth cotton is easy to trace on; linen and dark fabric need different tools.
- Stabilize your layers. Tape pattern + fabric so nothing shifts while you trace.
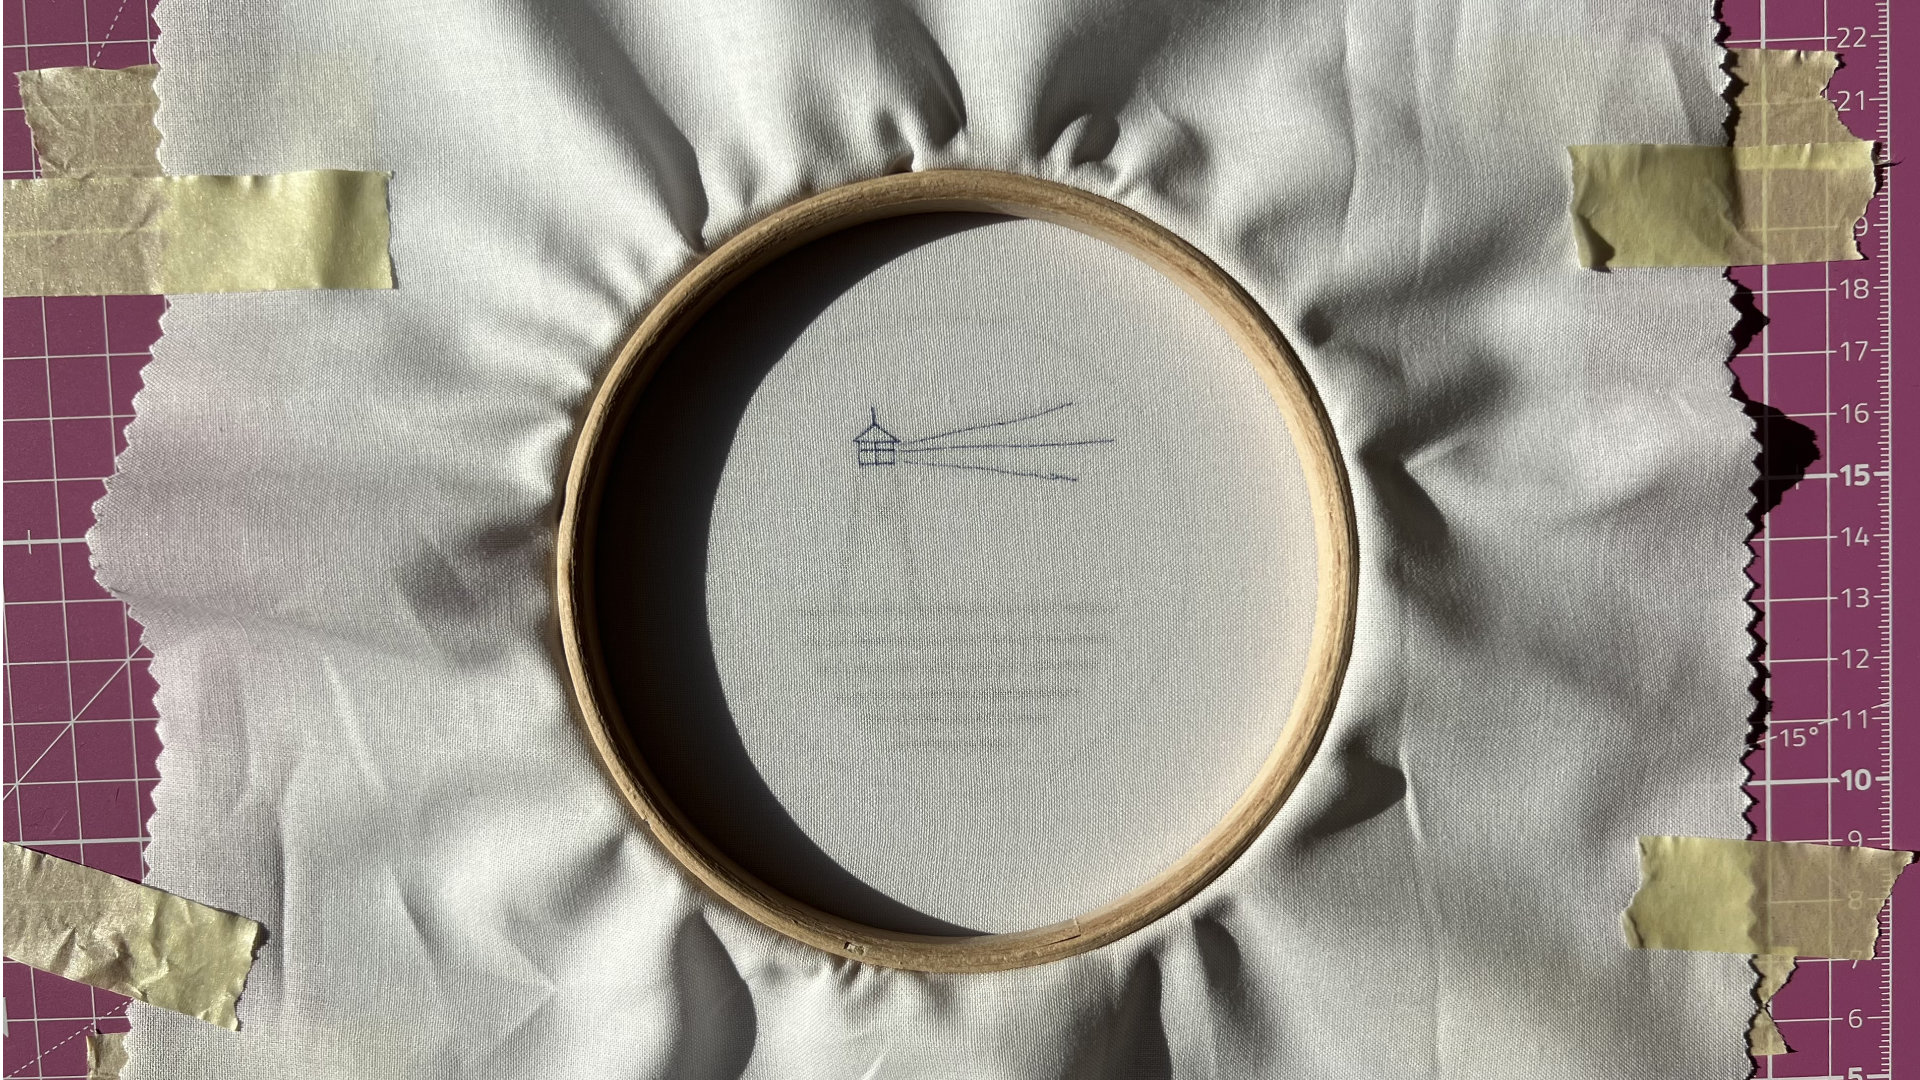
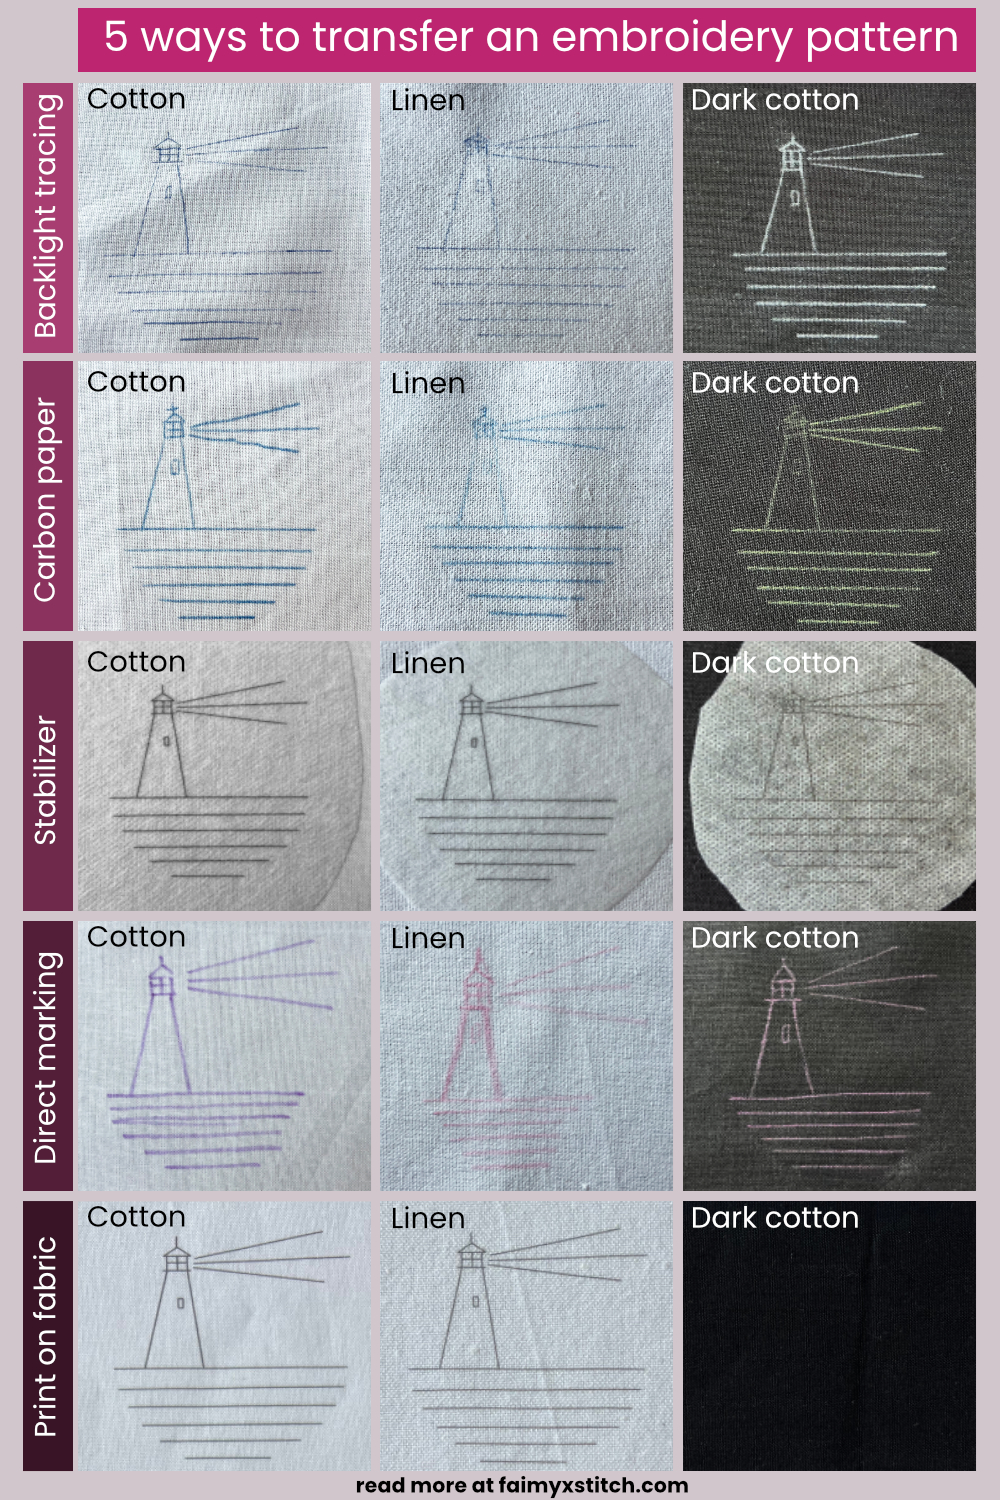
Method 1: Backlight tracing
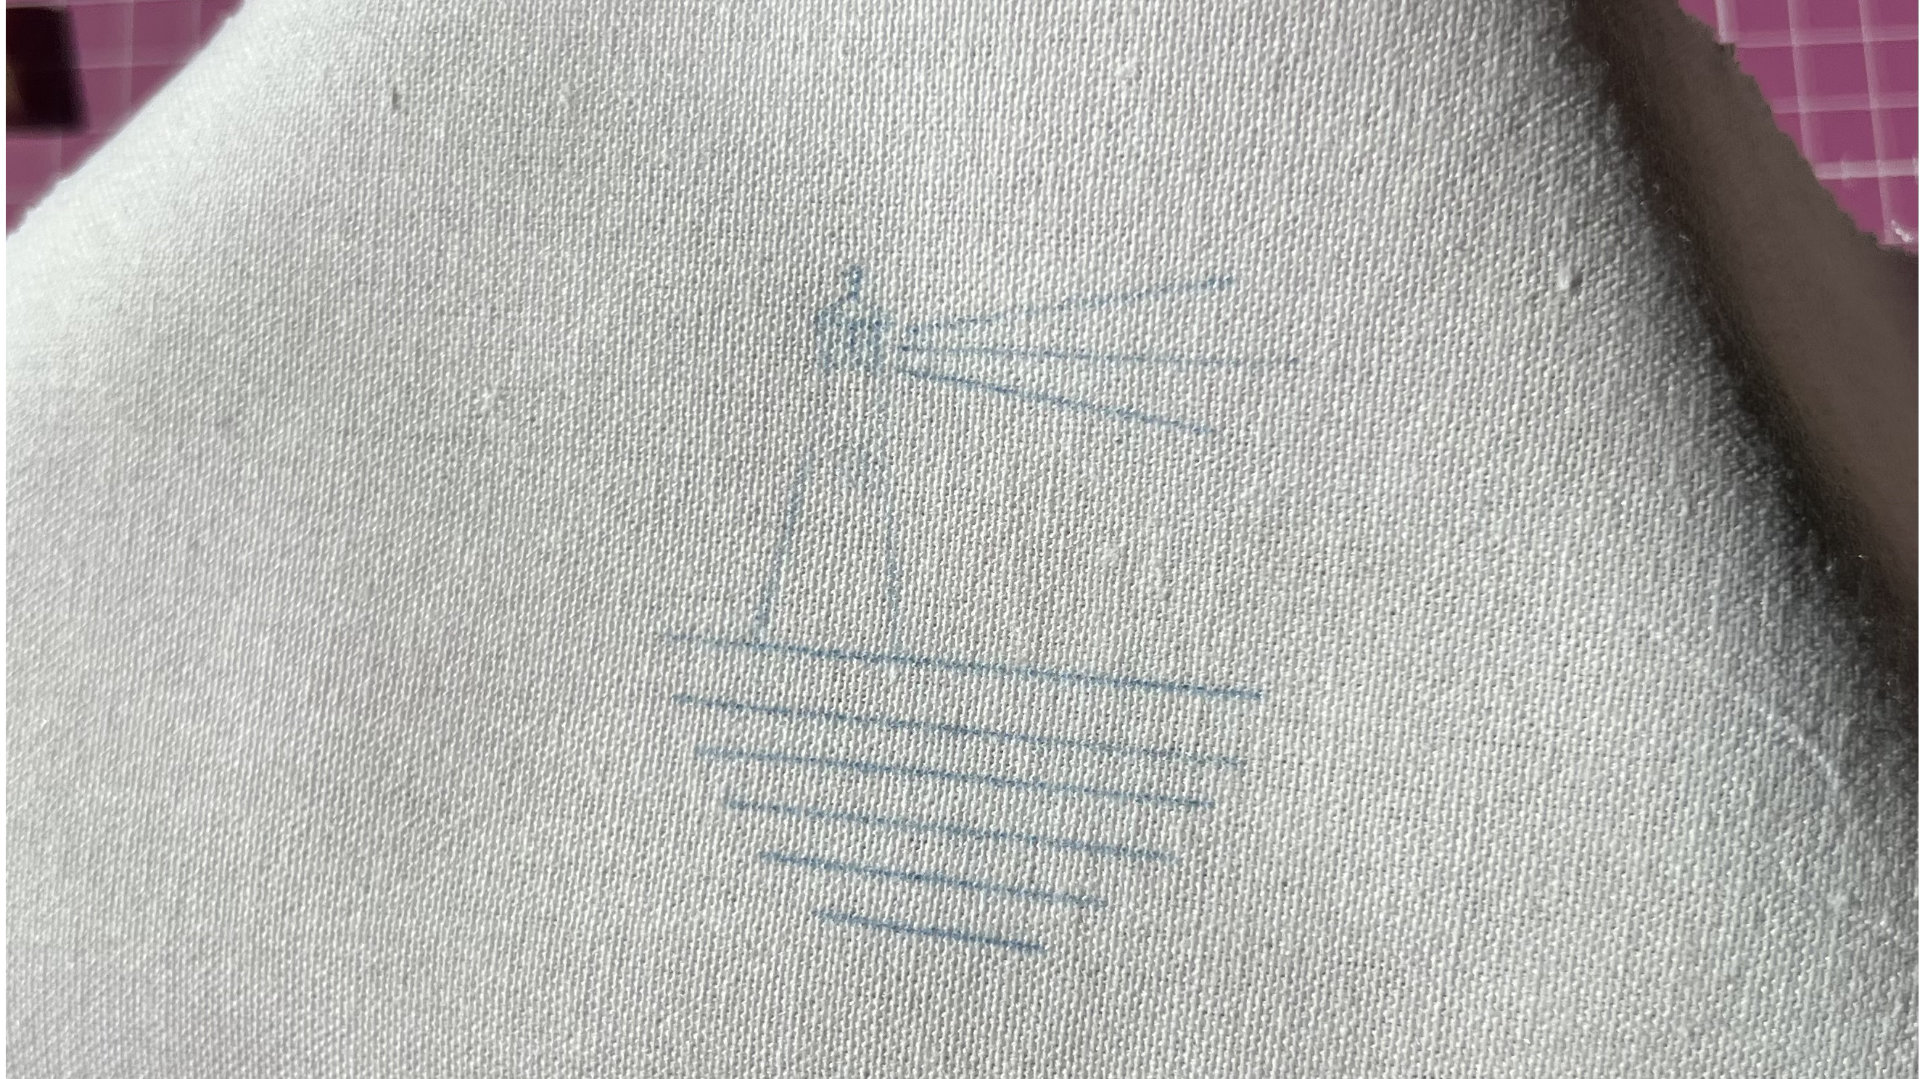
- 1Prep your setupIron your fabric first (wrinkles distort lines). I also like to trace while the fabric is already in the hoop, but as I mentioned above, make sure the fabric is not stretchy. (You will then trace on the back of the hoop and put the fabric right side up before stitching). Place your paper pattern underneath the fabric and line it up where you want it to sit when finished. Sometimes it's enough, and you can see through the fabric right away, so skip step 2 then. But keep in mind that this fabric will also show the threads on the back, to avoid that - use 2 layers when stitching.
- 2Add backlightUse a lightbox, a window in daylight, a tablet, or a phone under glass. Turn the brightness up so the lines show clearly through the fabric. For tablet users: turn on Guided Access or Screen Lock (depends on the type of tablet you have).
- 3Tape everything downTape the pattern to the surface, then tape the fabric on top. Taping all layers is the difference between crisp lines and a slightly “wobbly” design.
- 4Trace with light pressureTrace using a pencil or pen you’ve tested on this fabric. Use light, consistent pressure. If you press hard, you can dent fibers and/or leave stubborn marks. If you can feel ridges with your fingertip, you pressed too hard, switch to lighter pressure and a smoother surface under the fabric
- 5Work in sectionsTrace one area at a time. Move tape as needed, but keep at least two corners secured so nothing shifts.
- Tablet method: Open your design (or a blank white screen) at full brightness. Lock the screen so it won’t rotate or dim. On iPhone/iPad, Guided Access is perfect: Settings → Accessibility → Guided Access, then open your image and triple-click the side/top button → Start. Triple-click again to end.
 iPad as a backlight helps to see through the dark fabric sometimes
 - Phone flashlight + glass. Best for small designs: Put your phone on max brightness with the flashlight on, under a glass table (or a glass cutting board propped safely). Pattern + fabric go above the glass.
- Window method (simplest): Tape the pattern to a bright window and the fabric over it. Works best with daylight, of course.
 Don't forget to tape all layers. If the fabric is stretchy, don't use hoop while tracing
- Fabric shifts while tracing: Tape all corners, trace smaller sections, and avoid dragging your hand across the fabric, especially if you trace with chalk-based pen/easily smudging pen (rest your hand on a clean paper sheet).
- Lines are too faint: Increase brightness, darken your printed pattern, or cover the windows. You should get more light from the back of the design than over it. If nothing helps, switch to transfer paper/stabilizer methods.
- Pattern looks distorted: Make sure your fabric is flat (not overstretched) while transferring, and don’t tug it as you trace. If you're using stretchy fabric, consider following the stabilizer transfer method.
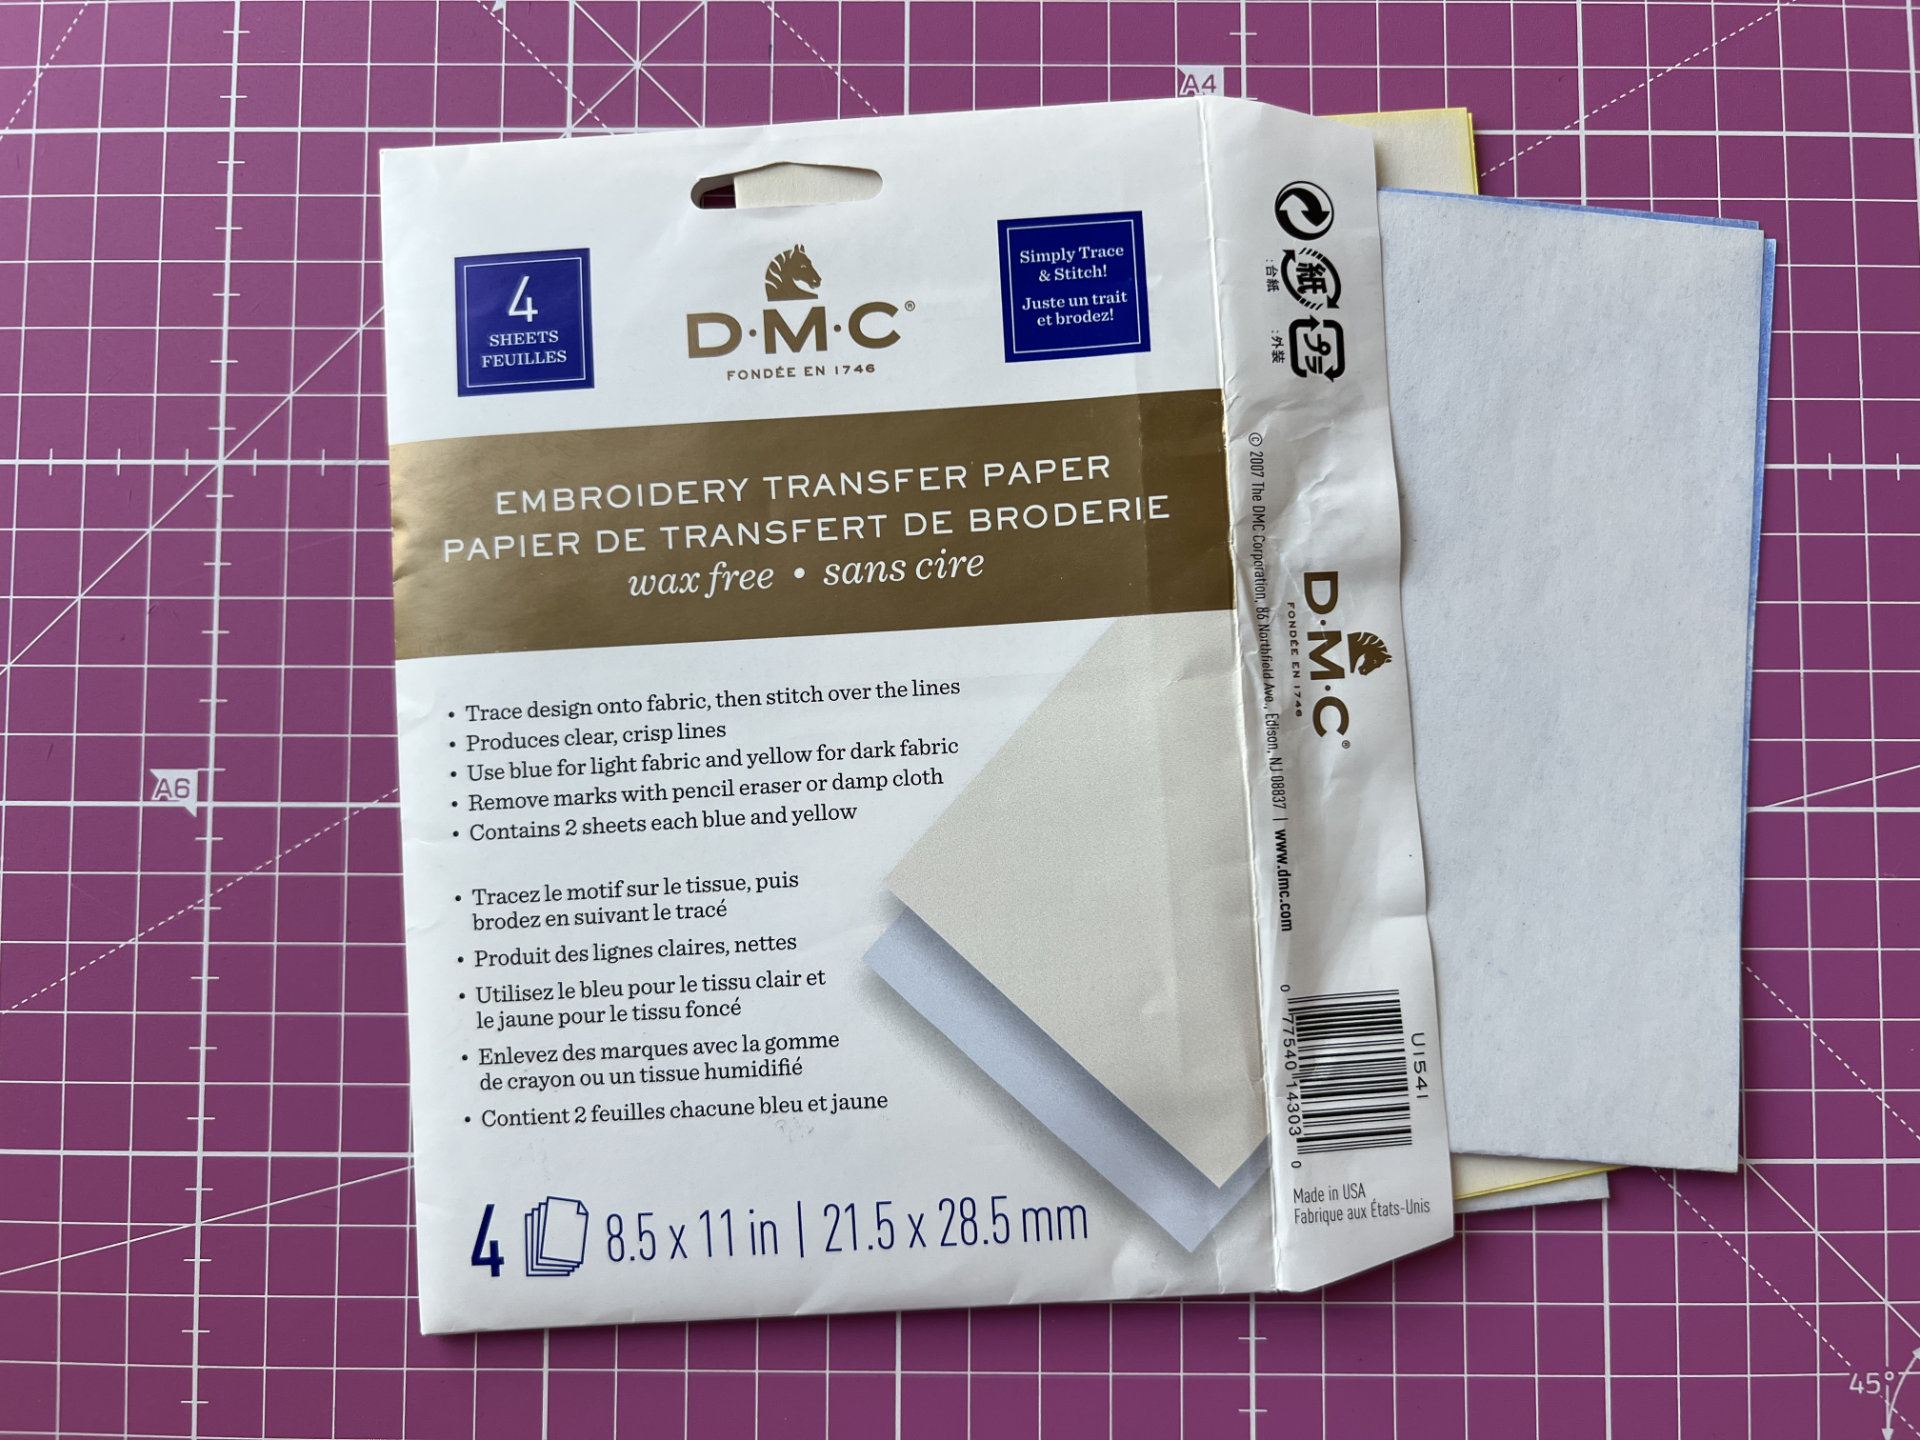
Method 2: Carbon/Transfer paper
- 1Layer it correctlyPut the fabric on the bottom. Then, place transfer paper, coated (shiny) side facing the fabric. Put the paper pattern on top.
- 2Tape all layersTape the pattern, transfer paper, and fabric together so nothing slides.
- 3Trace with a stylusUse a stylus, empty ballpoint pen, or pencil. I prefer to use something that leaves a line so I know what I already outlined. Trace with light, even pressure. Pressing too hard can dent fabric, especially on softer weaves.
- 4Peek before finishingLift one corner to check line strength. If it’s too faint, go over that section again rather than pressing harder everywhere.
- 5Avoid smudgingWork from one side to the other and place a clean sheet of paper under transfer paper where your hand is as you trace.
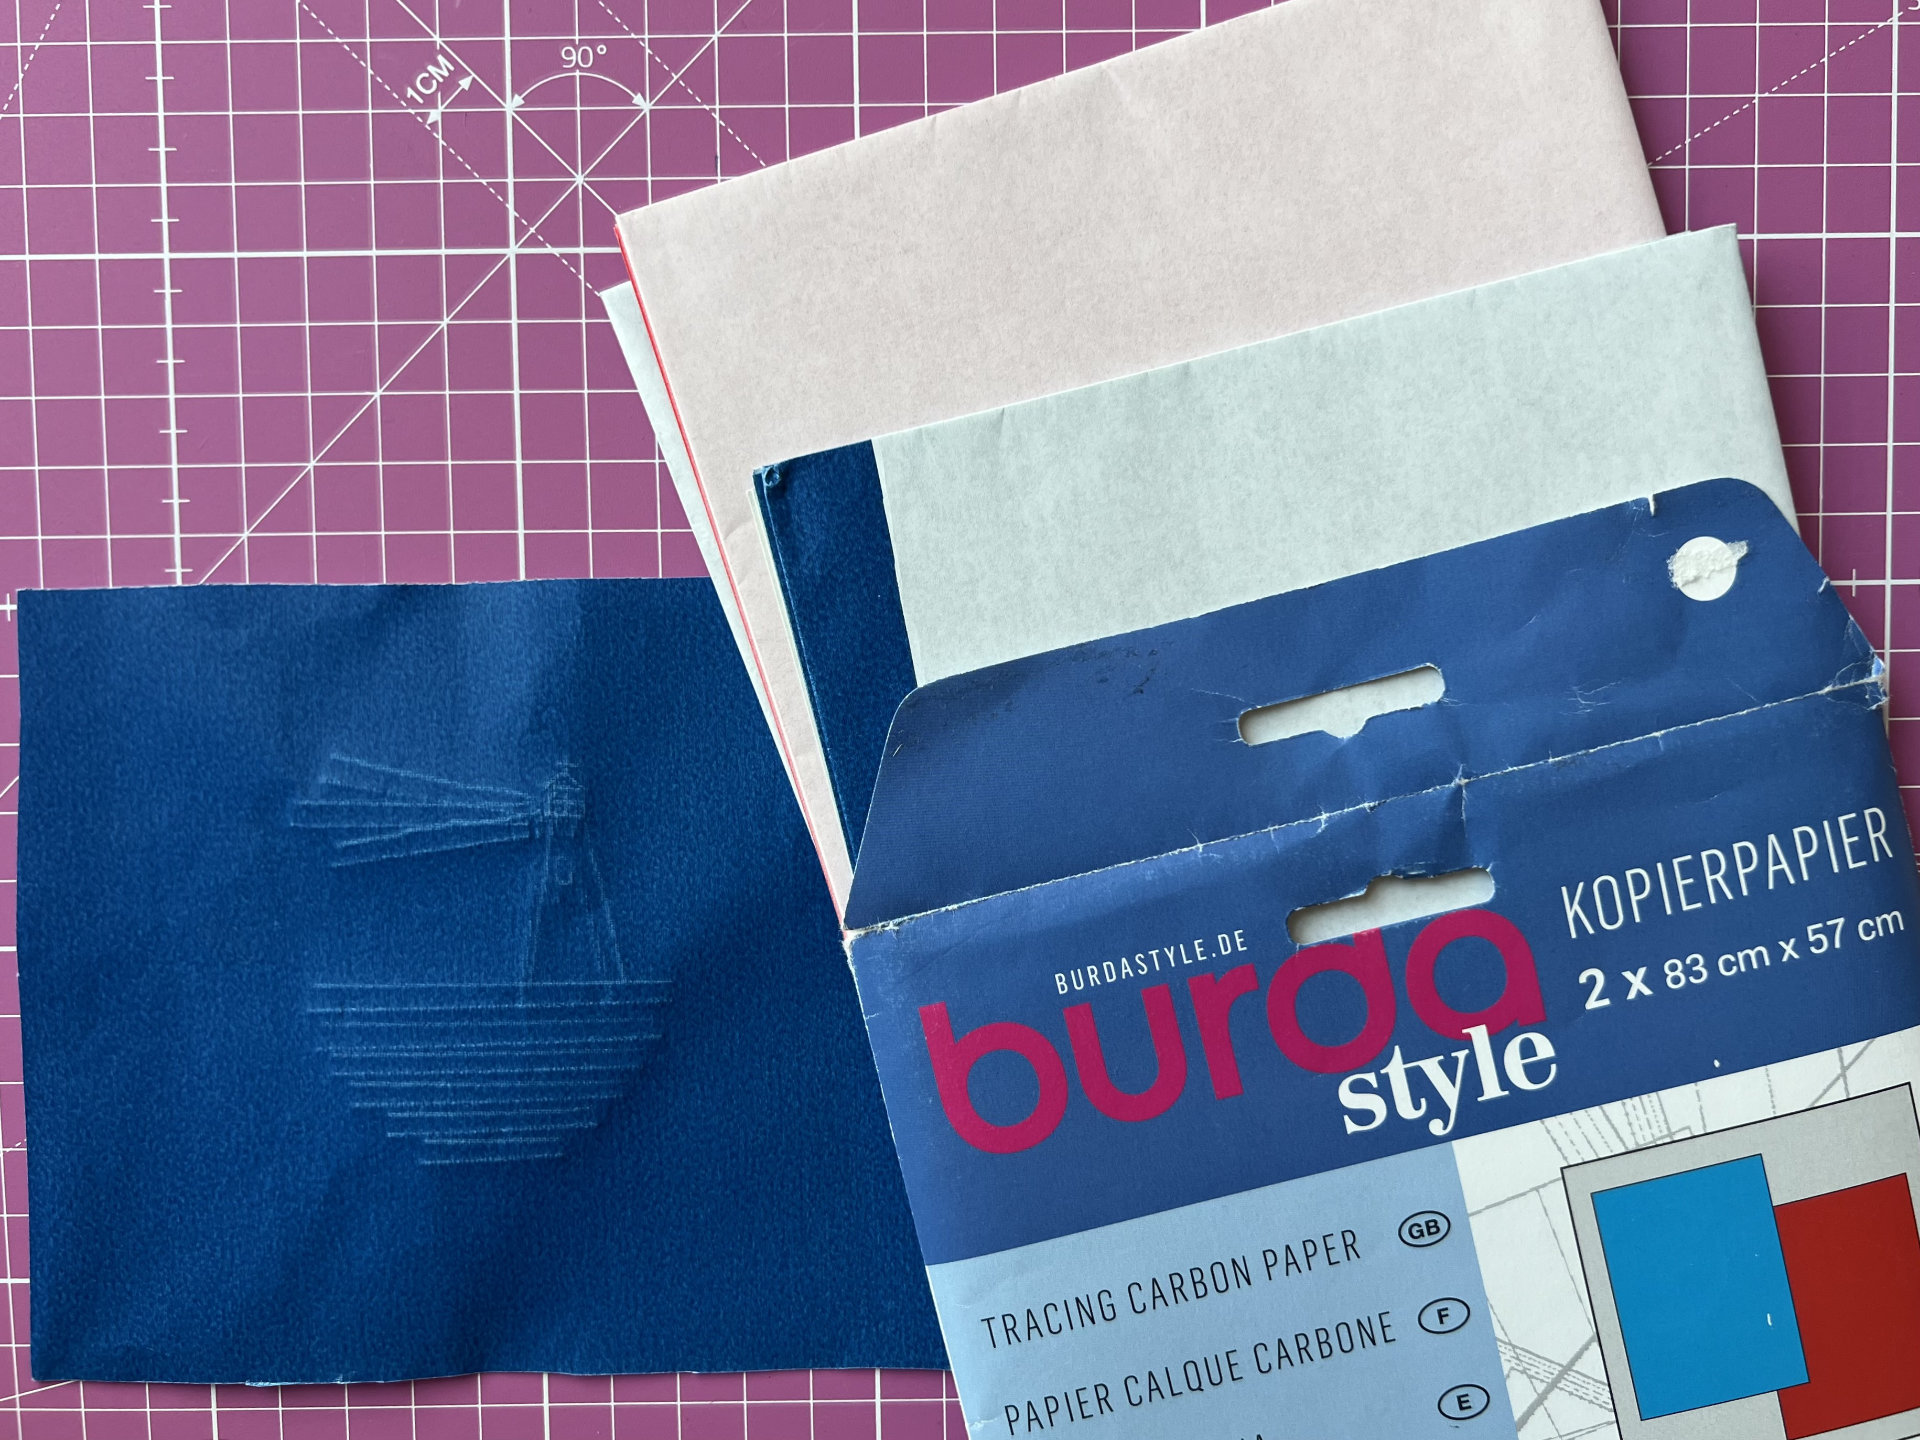

Best on linen and darks
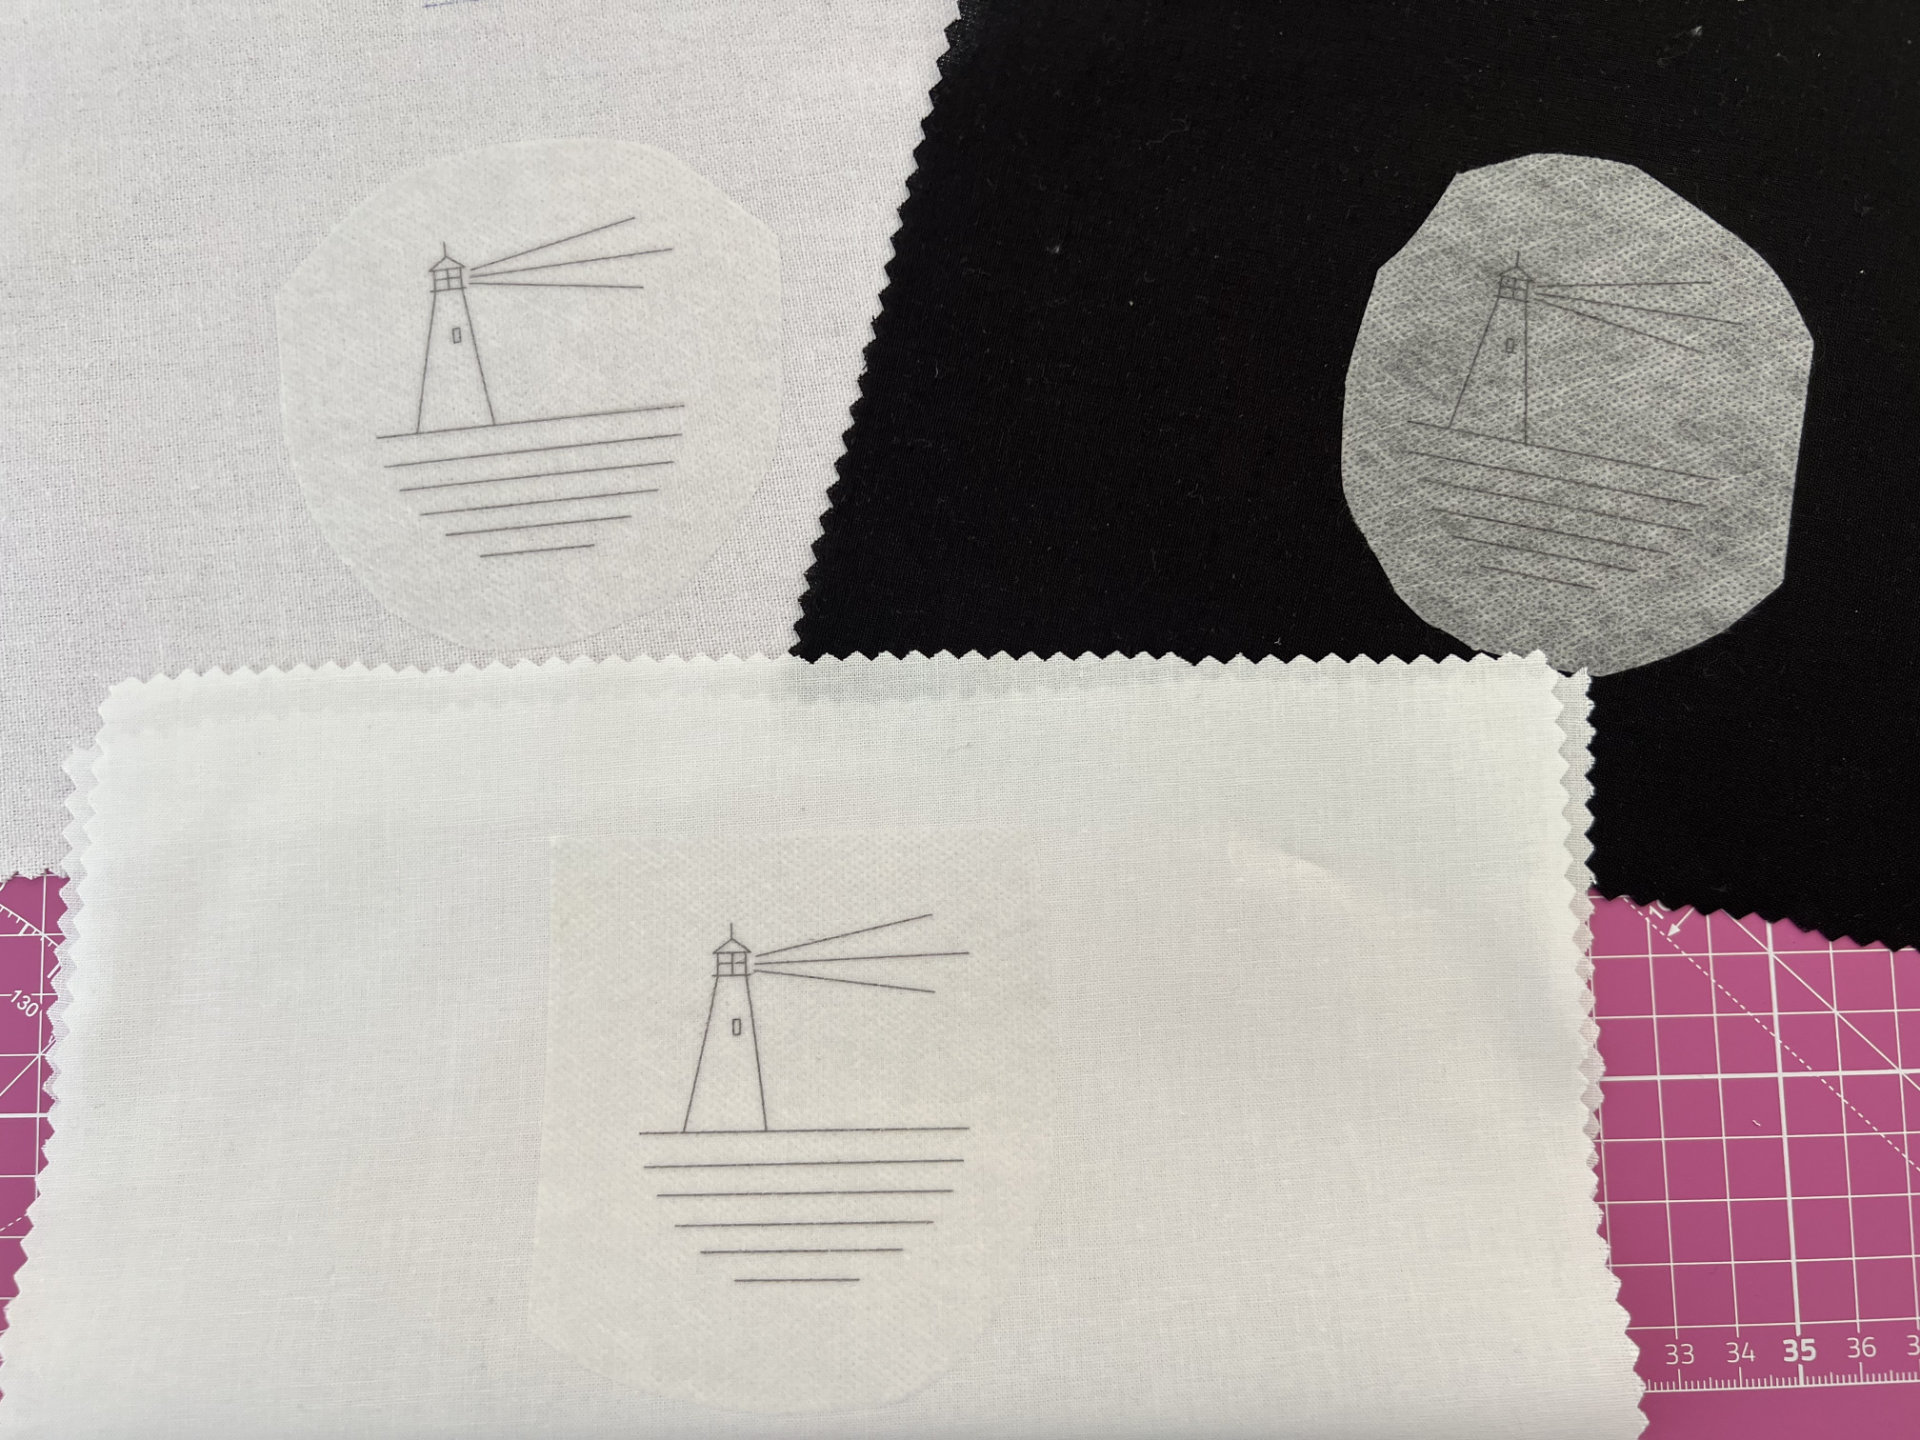
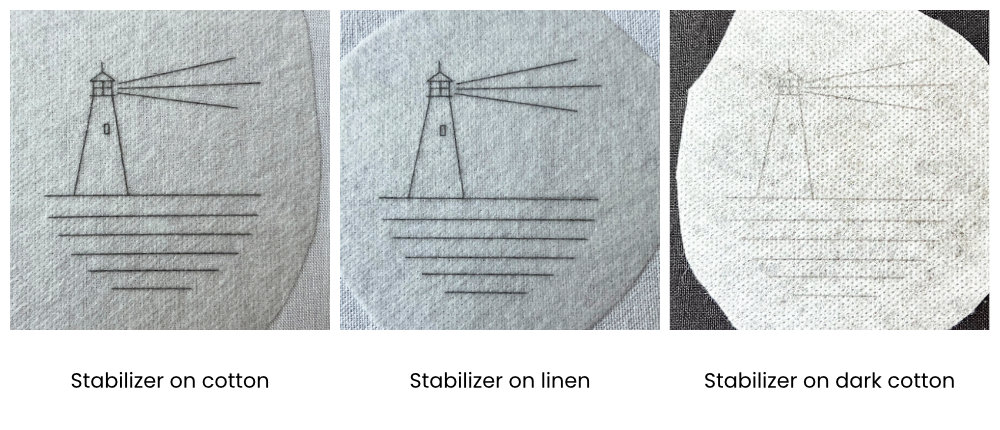
Method 3: Water-soluble stabilizer
- 1Put the design on stabilizerEither print onto printable water-soluble sheets (follow your product’s printer settings) or trace your design onto stick-and-stitch stabilizer. I also love to use the transparent stabilizer film. It is not sticky, so you mount it on the label paper, print the design, and stitch it onto the fabric. After completing the embroidery, wash it away, and enjoy!
- 2Stick it downSmooth the stabilizer onto clean, dry fabric. Avoid wrinkles or bubbles.
- 3Stitch through itHoop up and stitch as usual. The stabilizer keeps the lines visible the entire time, which is why many people love this method.
- 4Dissolve itWhen finished, soak and then rinse according to the package instructions until the stabilizer dissolves. Use gentle swishing rather than aggressive rubbing.
Stabilizer tips
- Plan for rinsing. If your piece can’t be washed (for example, it’s mounted on cardboard or includes elements that shouldn’t get wet), choose a different transfer method.
- Watch for thread bleeding. Some reds, navys, and very saturated flosses can bleed. Also, be careful with old and hand-dyed threads. Test your thread first, and use cooler water if you’re concerned.
- Rinse gently. Let the water do the work. Rubbing can fuzz stitches and push residue into dense areas.
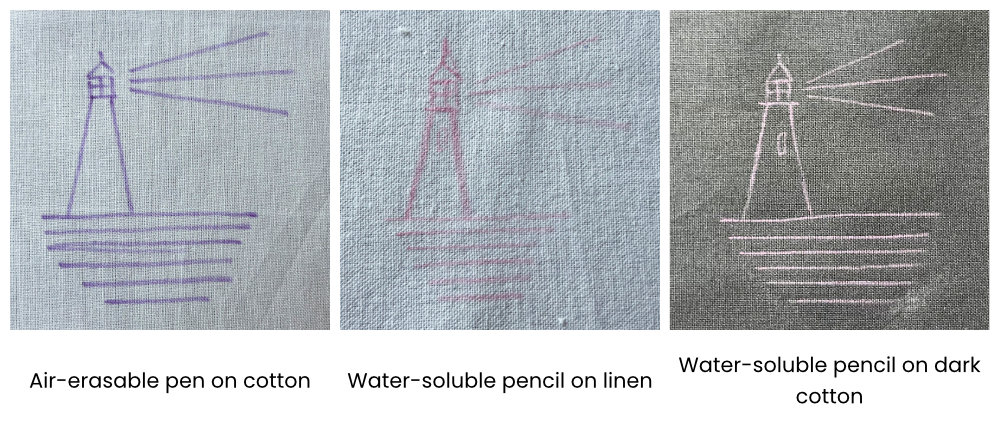
Method 4: Direct marking (pens/pensils/chalk
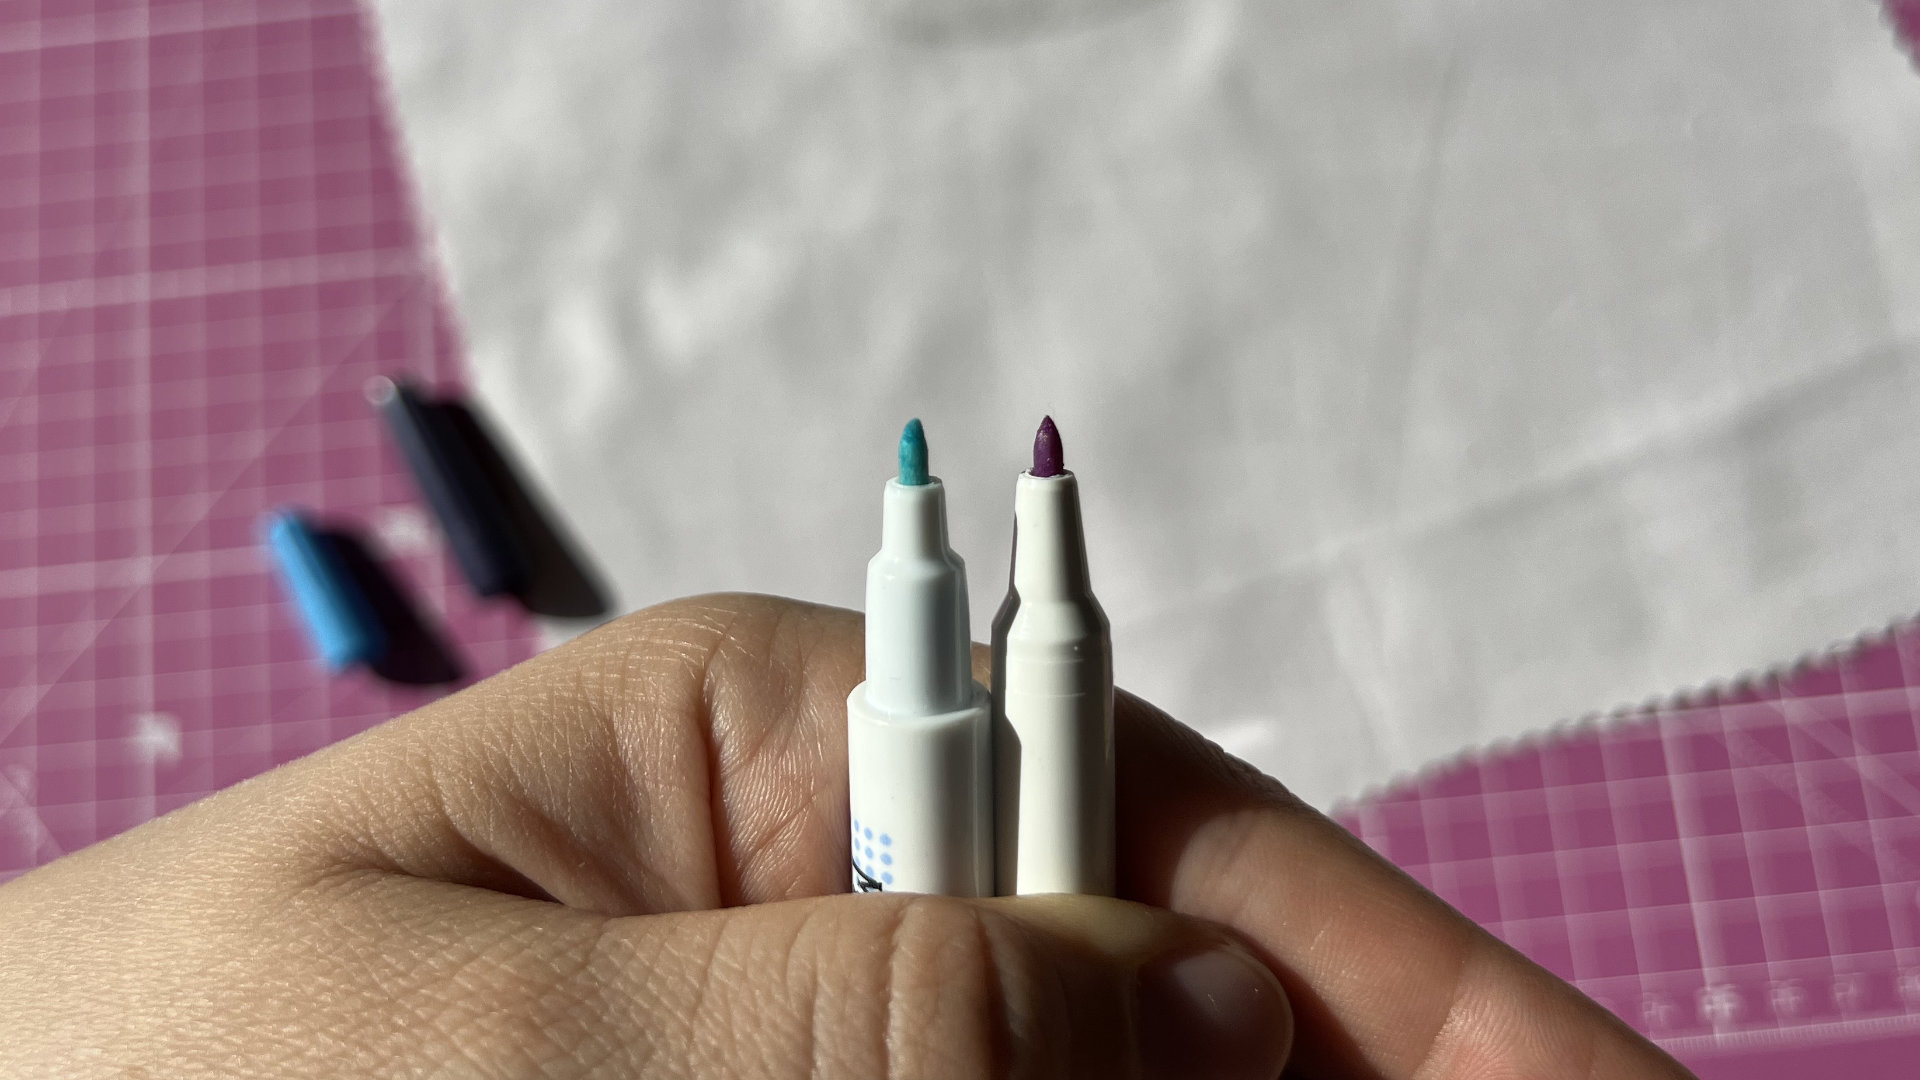
- Water-erasable pen: Blue ink. Great on many light fabrics. Some inks fade on their own over time, which can be helpful or annoying.
- Air-erasable pen: Purple ink. Also great on light fabrics. Often disappears pretty fast, good for short projects. Humidity can also make ink disappear mid-project.
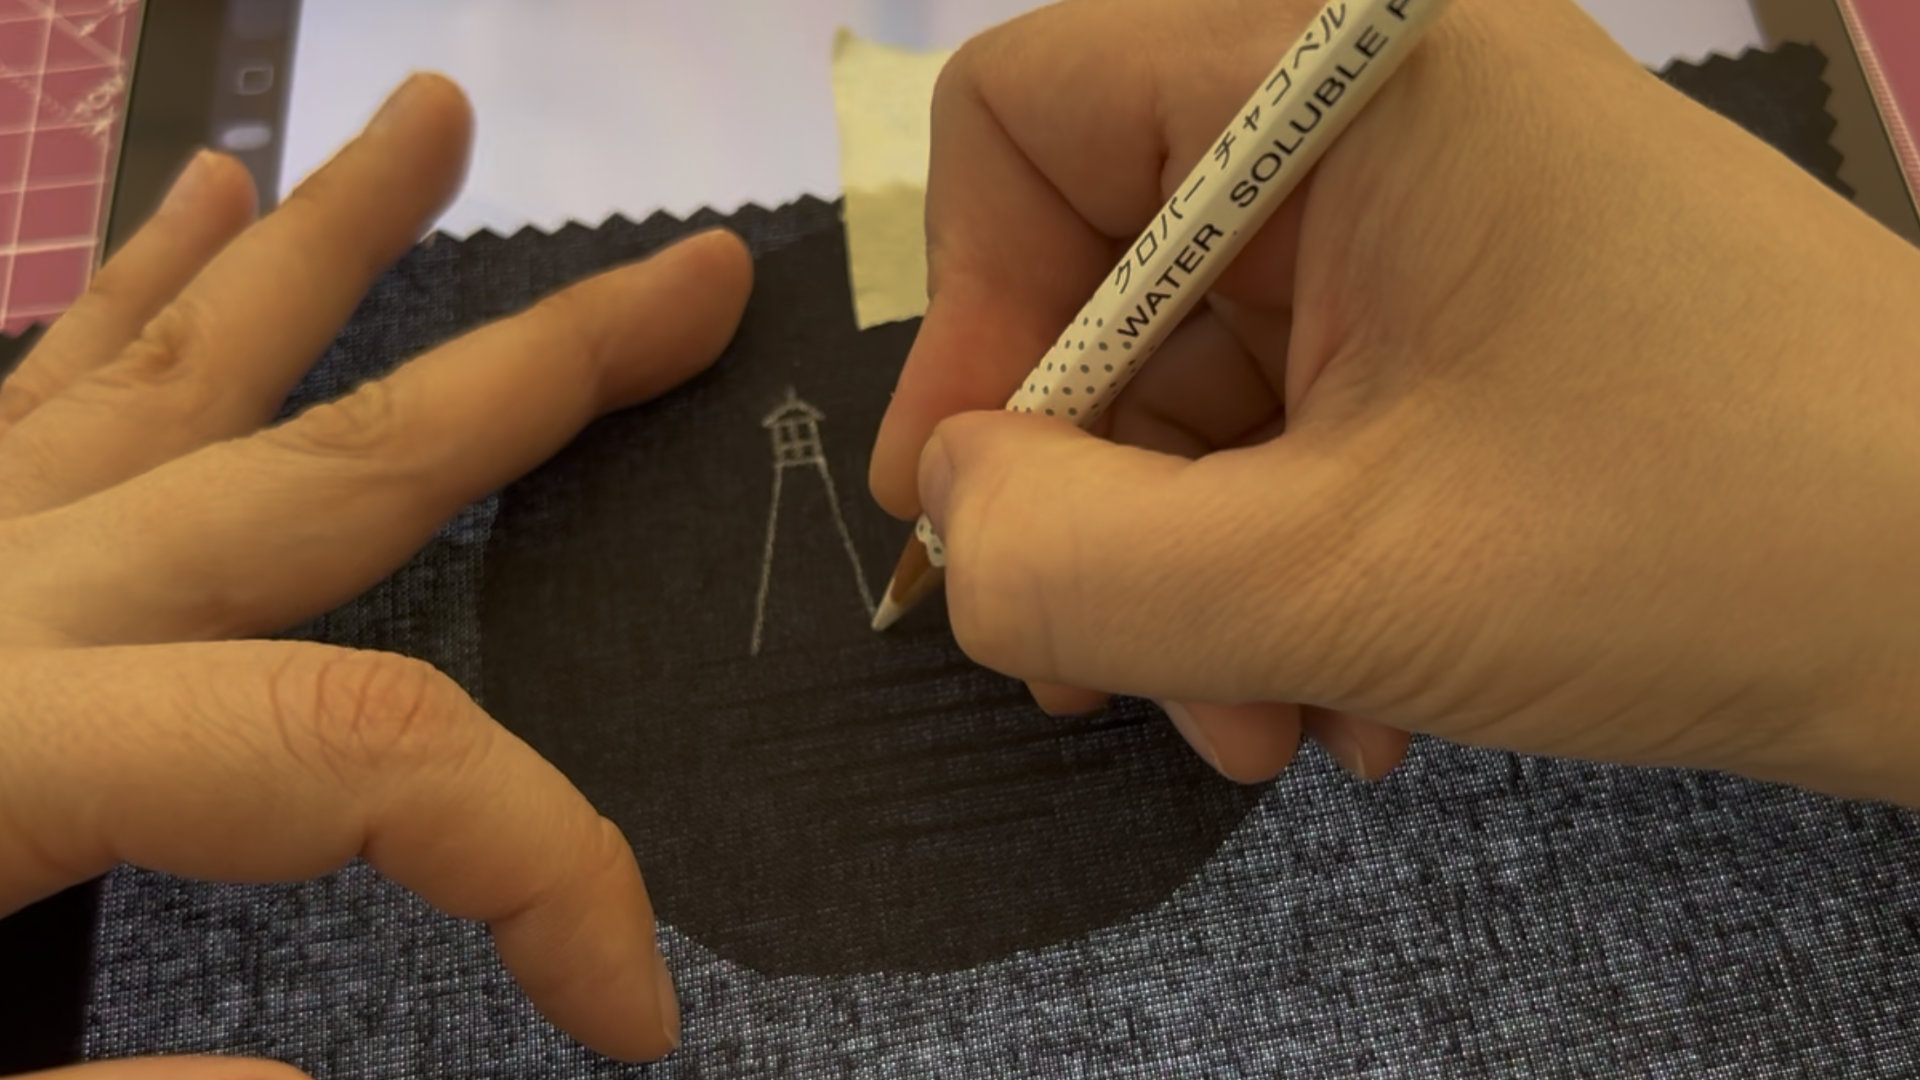
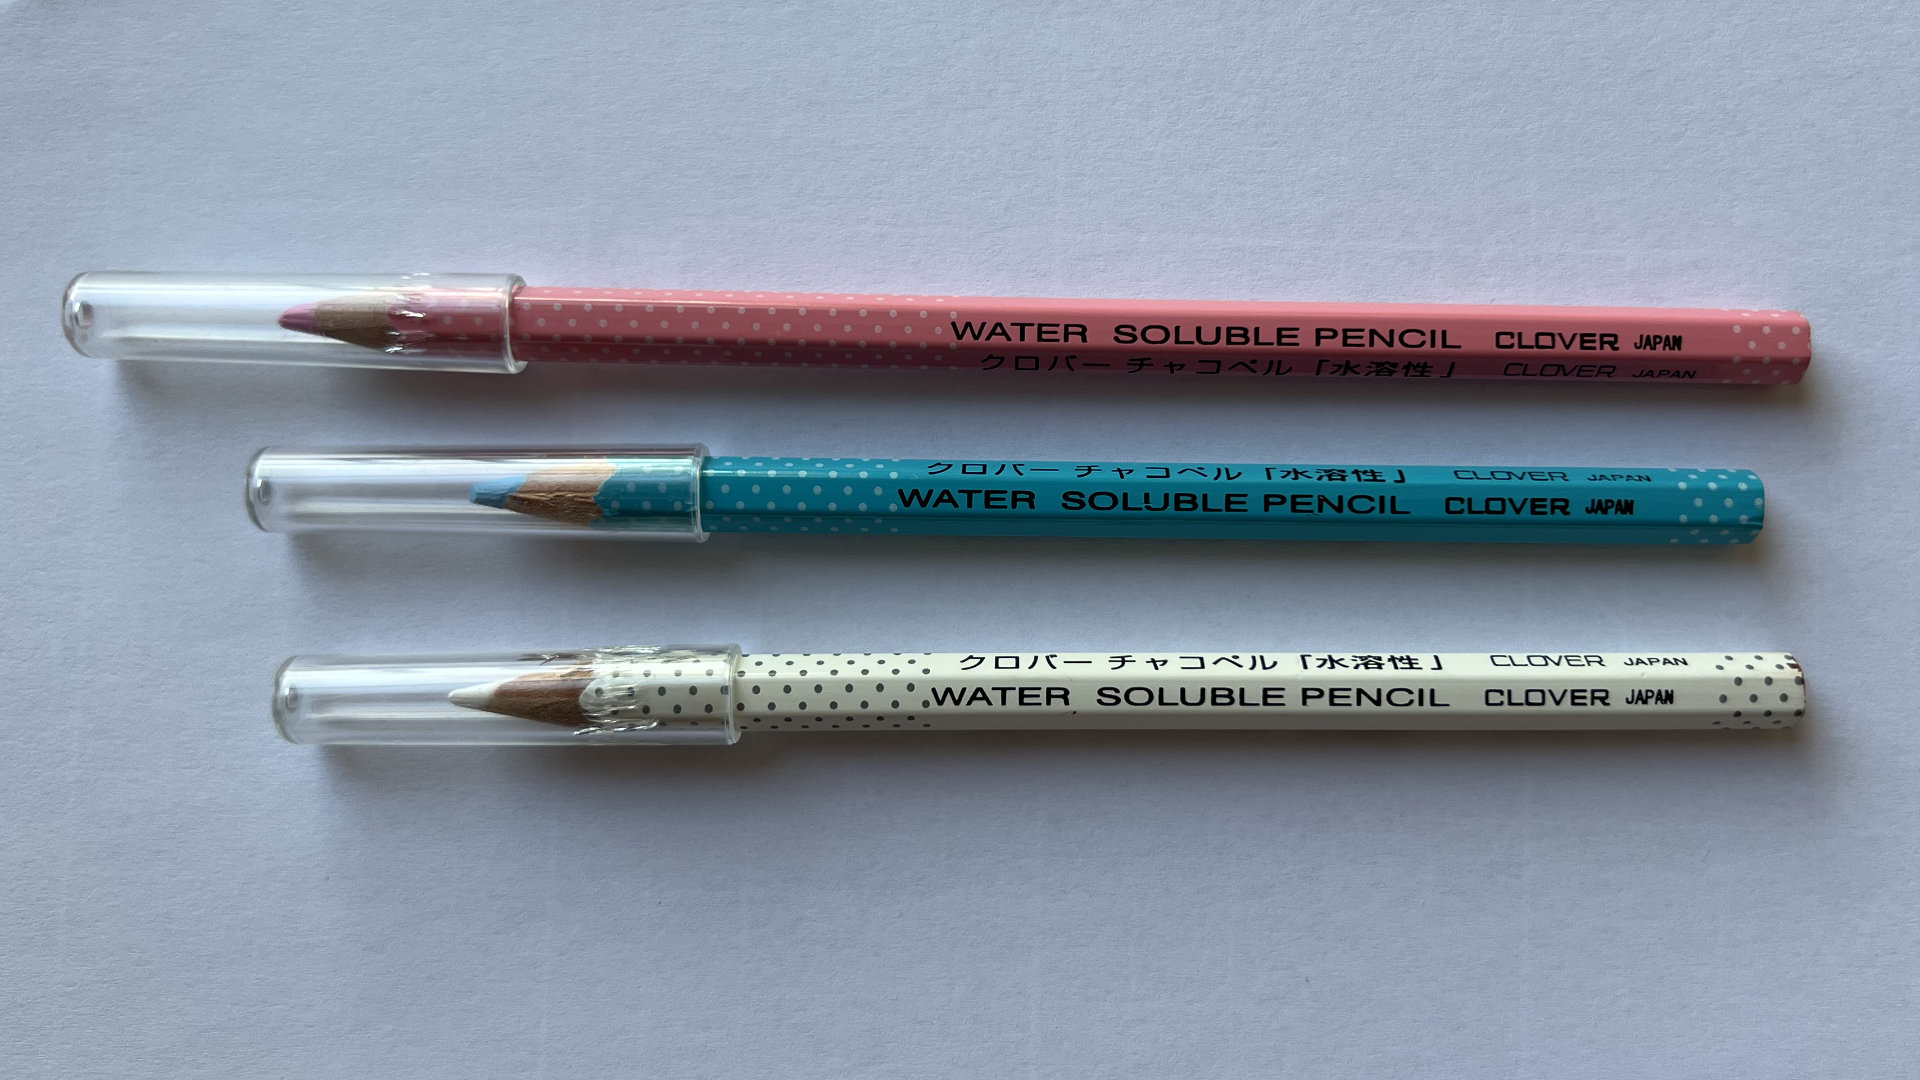
- Chalk pencil/tailor’s chalk: Nice for darker fabrics and bolder shapes. Can rub away while you stitch, so it’s better for simple outlines.
- White colored pencil: Useful on dark fabric and felt. Test for how it erases and whether it leaves a "shine": on some fabrics.
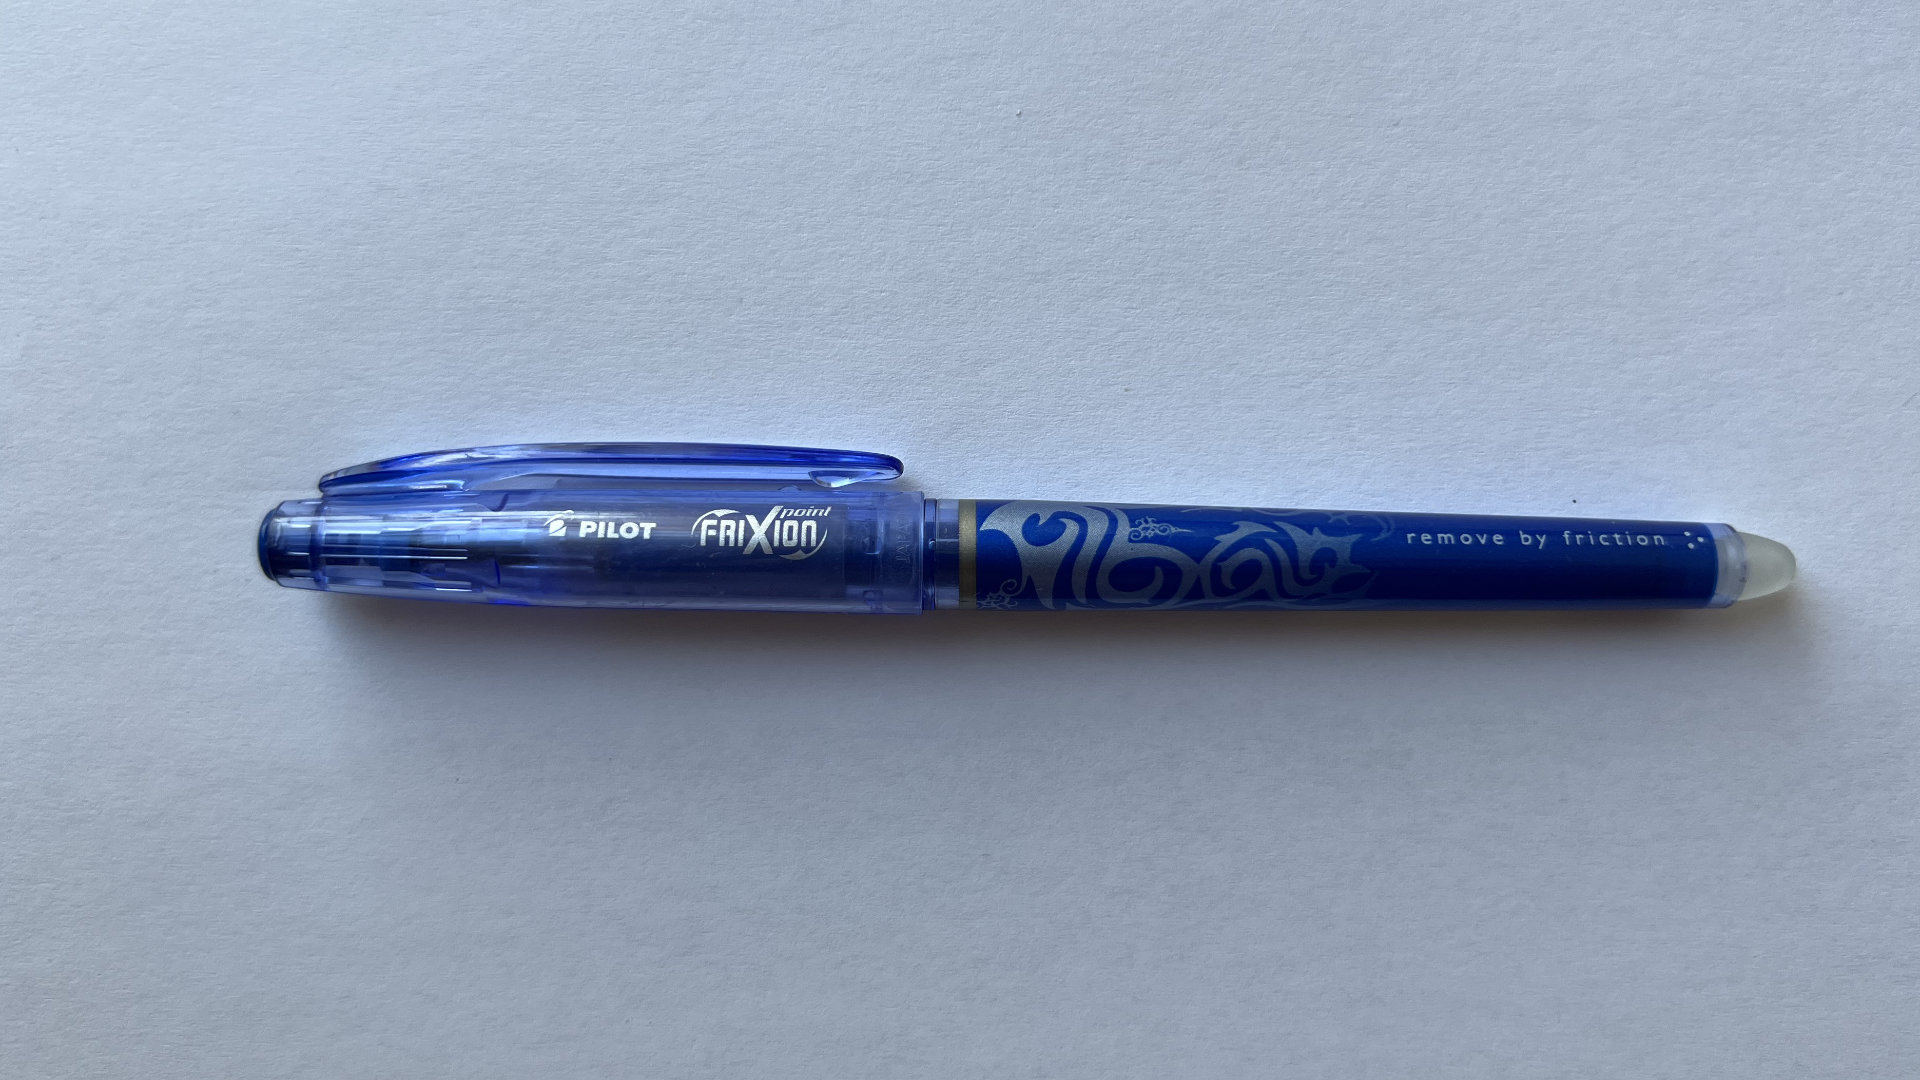
- Heat-erasable pen: Use with caution. The line may vanish with heat, but it can reappear in cold temperatures. It can also set permanently if ironed too hot on some fabrics.
- Graphite pencil (regular pencil): Often fine for pieces that will be fully stitched, but it can be hard to remove completely on some fabrics. Keep it very light.

Choose tools safely
- Mark lightly and assume you may not get 100% removal.
- If your design includes open areas (like satin stitch shapes or light fills), choose a tool that won’t show through.
- If you’ll be stitching over many days, avoid inks that disappear on their own unless that’s what you want.
Method 5: Print directly on fabric
- Choose the right fabric Use stable, non-stretch woven fabric (cotton/linen blends work well). Avoid knits and very stretchy fabric for direct printing.
- Mount the fabric to a carrier sheet Attach the fabric to a full A4 sheet of label paper so it feeds like regular paper. Smooth it down firmly: no bubbles, no lifted corners allowed. Trim all hanging strands.
- Print with an inkjet printer Print your design onto the fabric. Let it dry fully before handling. It doesn't have to be for long, just leave it for a couple of minutes
- Stitch with the "permanent line" mindset This method is for designs where the printed line will be covered by thread. If your design has open, unstitched areas, choose a temporary method instead.
- If your fabric is stretchy (or you want wash-out lines) Choose a printable water-soluble stabilizer instead. You’ll still get crisp placement, but removal is wash-away.
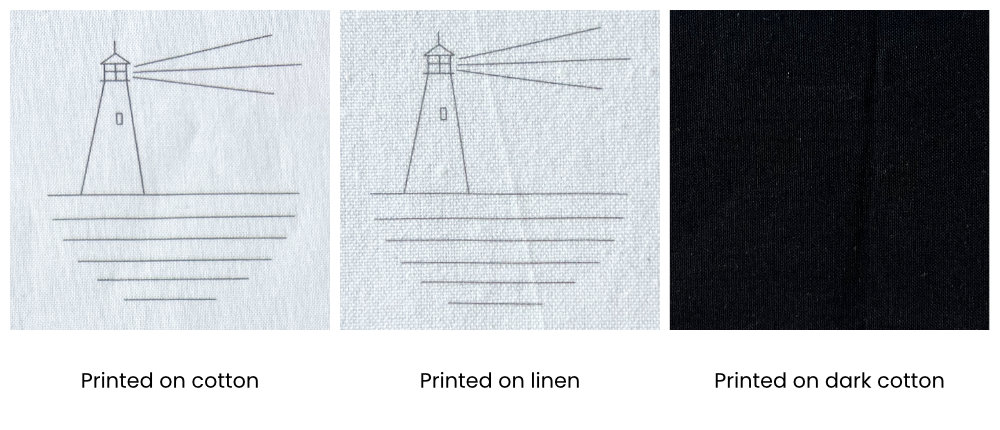
- Trim stray threads and keep edges flat. Anything lifted can catch.
- Keep printed lines thin and light if you’ll cover them with satin stitch or light fills.
- If ink feathers on your fabric, switch to the stabilizer method or a tighter weave fabric.
- You're limited with the printing area, but there's a way to print an 8-inch image on an A4 fabric. Check out my video tutorial for more info!
- Pouncing (prick and pounce): Prick holes along your paper pattern, rub pounce powder through the holes, then connect dots with a pencil/pen. Very traditional and great for repeating motifs. Best on light to dark fabrics when you have the right powder.
- Iron-on transfer pencil/pen: Trace your pattern onto tracing paper with a heat-transfer pencil, then iron it onto fabric. Helpful for lettering and repeated designs, but it’s often more permanent than you'd expect - test carefully and avoid for heirloom pieces unless you’re confident. Iron-on transfers require the reversed (mirrored) images. Keep that in mind.
- Printable fabric sheets: Print directly onto special sheets, then stitch. These are typically meant to remain in the work or be washed away, depending on the type. Read the packaging closely. They are like pre-mounted fabric on the sticky paper. So you can do it yourself or get the special fabric sheets that are already mounted and usually treated for better printing results.
- Projector transfer: Project your design onto the fabric, tape the fabric flat, then trace the lines with a marking tool. Great for thick fabrics, large designs, dark fabric, and "I don't have a lightbox" situations because you’re not relying on light shining through. The transfer is only as removable as the tool you trace with. Test first, and keep the fabric flat (not stretched) to avoid distortion.
- Freezer sheets (freezer paper stencil): Trace or print the design onto freezer paper, cut out the shapes, then iron the shiny side lightly onto the fabric to create a temporary stencil. Great for bold shapes, lettering, and clean edges. Especially when you want to paint, ink, or lightly mark inside the stencil. Not ideal for tiny details, and some fabrics don’t love heat; test your iron setting and peel slowly to avoid shifting or residue.
- Basting/thread transfer (no ink). Mark your design with thread instead of pens. You can make long running stitches along the main lines, add tailor’s tacks for key points, or stitch through paper with a simple running stitch and then tear the paper away. It takes longer than tracing, but it is one of the safest options for heirloom pieces and garment embroidery when you do not want any pigment or ink on the fabric.
Transfer Picker Quiz
Do you have an inkjet printer?
- Yes
- No
Do you want printed transfer lines to wash out?
- Yes
- No
Is your fabric light enough that black printed lines will show clearly?
- Yes
- No
Is your fabric non-stretch (stable woven)?
- Yes
- No
Do you have a projector?
- Yes
- No
Is your fabric thin enough so light can shine through it?
- Yes
- No
What color is your fabric?
- Light
- Dark
Do you have an iron?
- Yes
- No
Do you want traced transfer to wash out?
- Yes
- No
Print on wash-away stabilizer
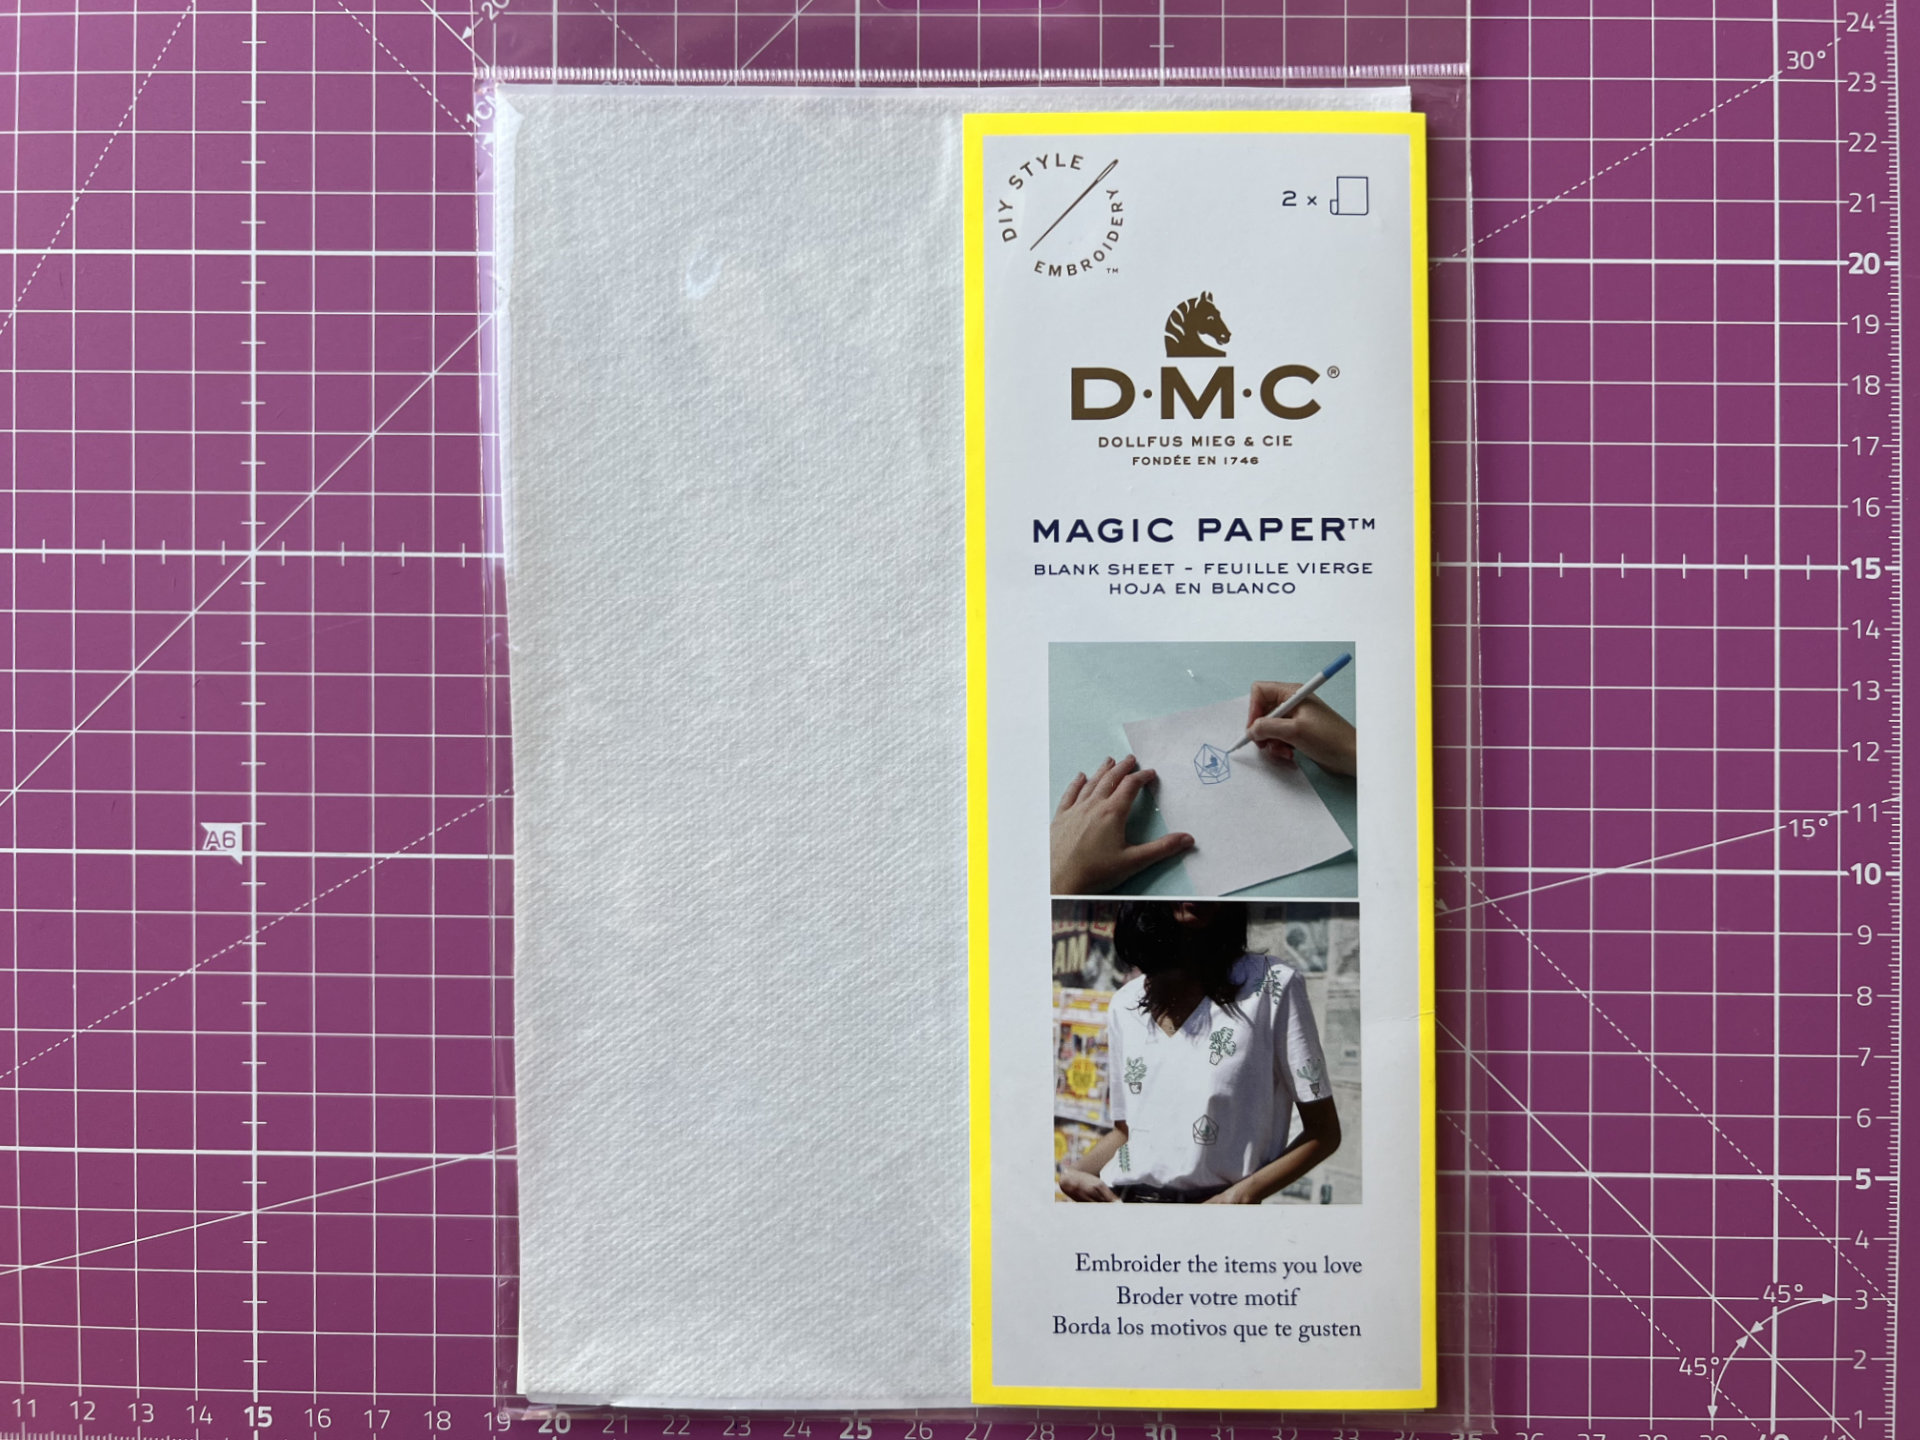
**Best for: **dark fabric, textured linen, high-detail patterns, stretchy fabric, beginners who want lines visible the whole time **What to do:** - Print your design onto sticky water-soluble stabilizer (e.g., Sulky Printable Sticky Fabri-Solvy, DMC Magic Paper) or onto water-soluble film (non-sticky). - Stick (or stitch) it on the fabric, smooth flat, then stitch through it. - Rinse/soak to dissolve when finished (follow the product instructions). **Removal note:** Requires water
Tip: Avoid wrinkles/bubbles (they distort). If your floss might bleed, test a thread first and use cooler water.
Print directly on fabric (inkjet direct print)
**Best for: **light fabric where the ink lines will be fully covered by stitching, non-stretch fabric **What to do:** - Attach stable, non-stretch fabric to label/freezer paper so it feeds like an A4 sheet. - Check there are no bubbles or wrinkles, and cut the hanging threads. - Print your design with an inkjet printer onto the fabric. - Stitch over the lines. **Removal note:** Permanent. The ink will not wash out.
Tip: Keep ink lines thin and light. Only use this if the printed lines will be covered by thread (avoid open, unstitched areas). If the fabric is stretchy, print on wash-away stabilizer
Projector transfer
**Best for:** thick fabric, dark fabric, textured linen, large pieces **What to do:** - Project the design onto your fabric (projector/phone + stand). - Tape the fabric flat and trace the lines. - Choose a marking tool based on fabric color (see the tool recommendations below). **Removal note:** Depends on the marking tool you choose, test first.
Tip: Keep the fabric flat (not overstretched). Check alignment before tracing everything.
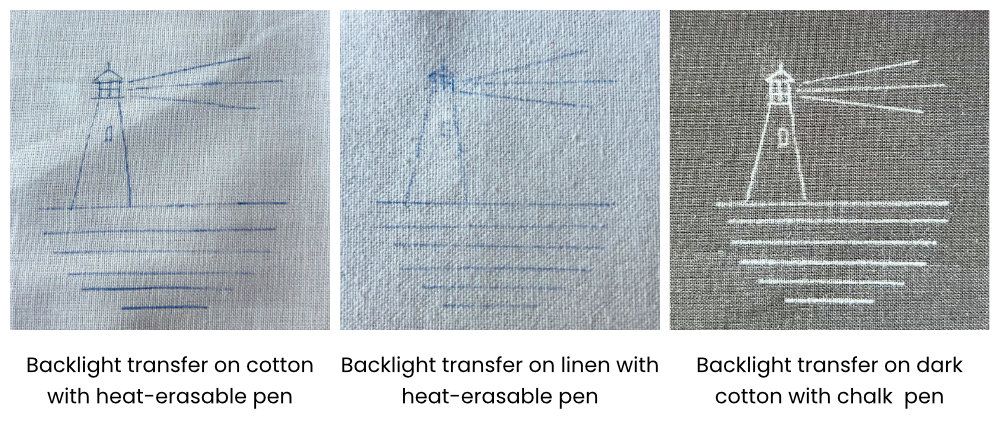
Backlight transfer on light fabric
**Best for:** light fabrics you can see through **What to do:** - Put the paper pattern under the fabric. - Use a window, tablet/phone screen, or light box as your backlight. - Tape pattern + fabric so nothing shifts, then trace with light pressure. **Removal note:** Depends on the marking tool, test first. **Quick tips:** If linen looks dotted/broken, switch to transfer paper or water-soluble stabilizer. Pick one marking tool (test before): **Permanent-ish:** Pencil; Micron liner; Sharpie pen **Temporary:** Frixion pen; water-soluble fabric marker; air-soluble fabric marker; quilter’s pencil **Removal note:** Varies; some “temporary” inks can fade early or cling longer than expected.
Tip: Keep lines whisper-light so they won’t show under light-colored satin stitch or open fills.
Backlight transfer on dark fabric
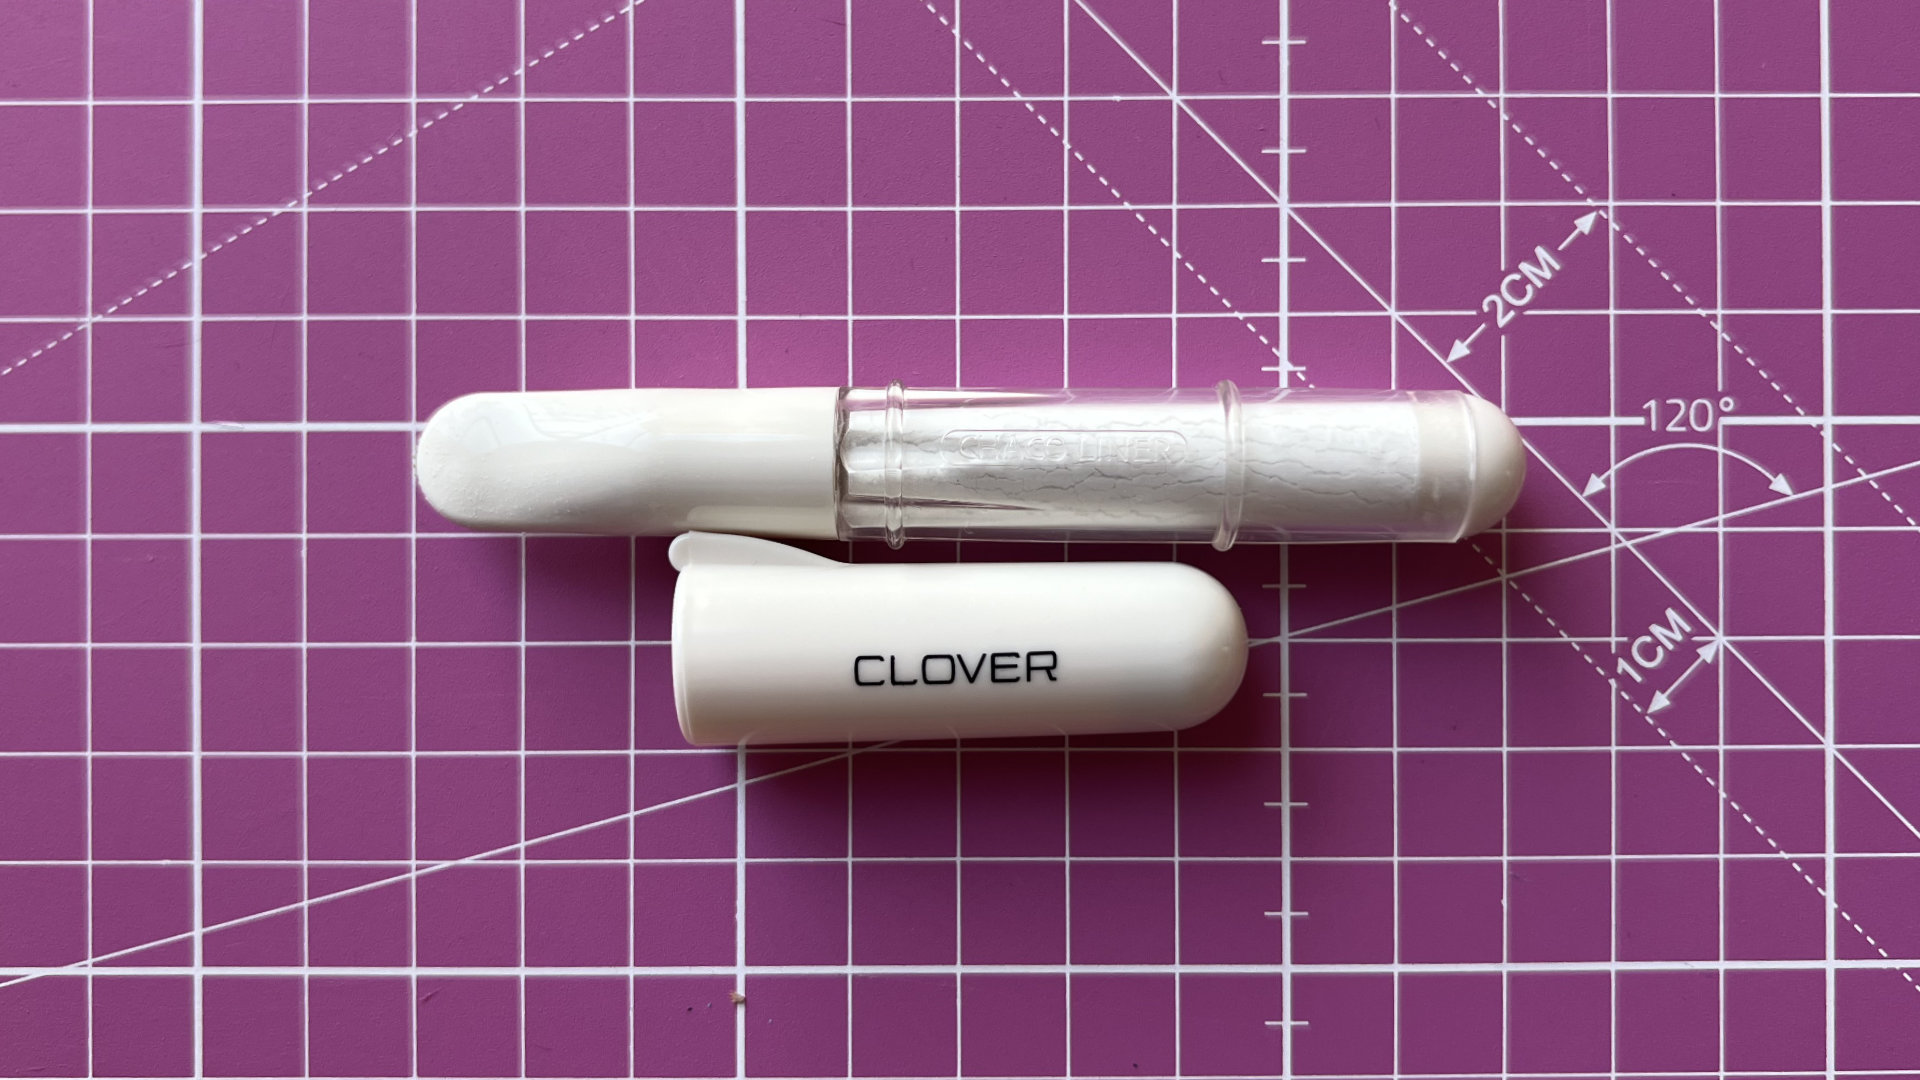
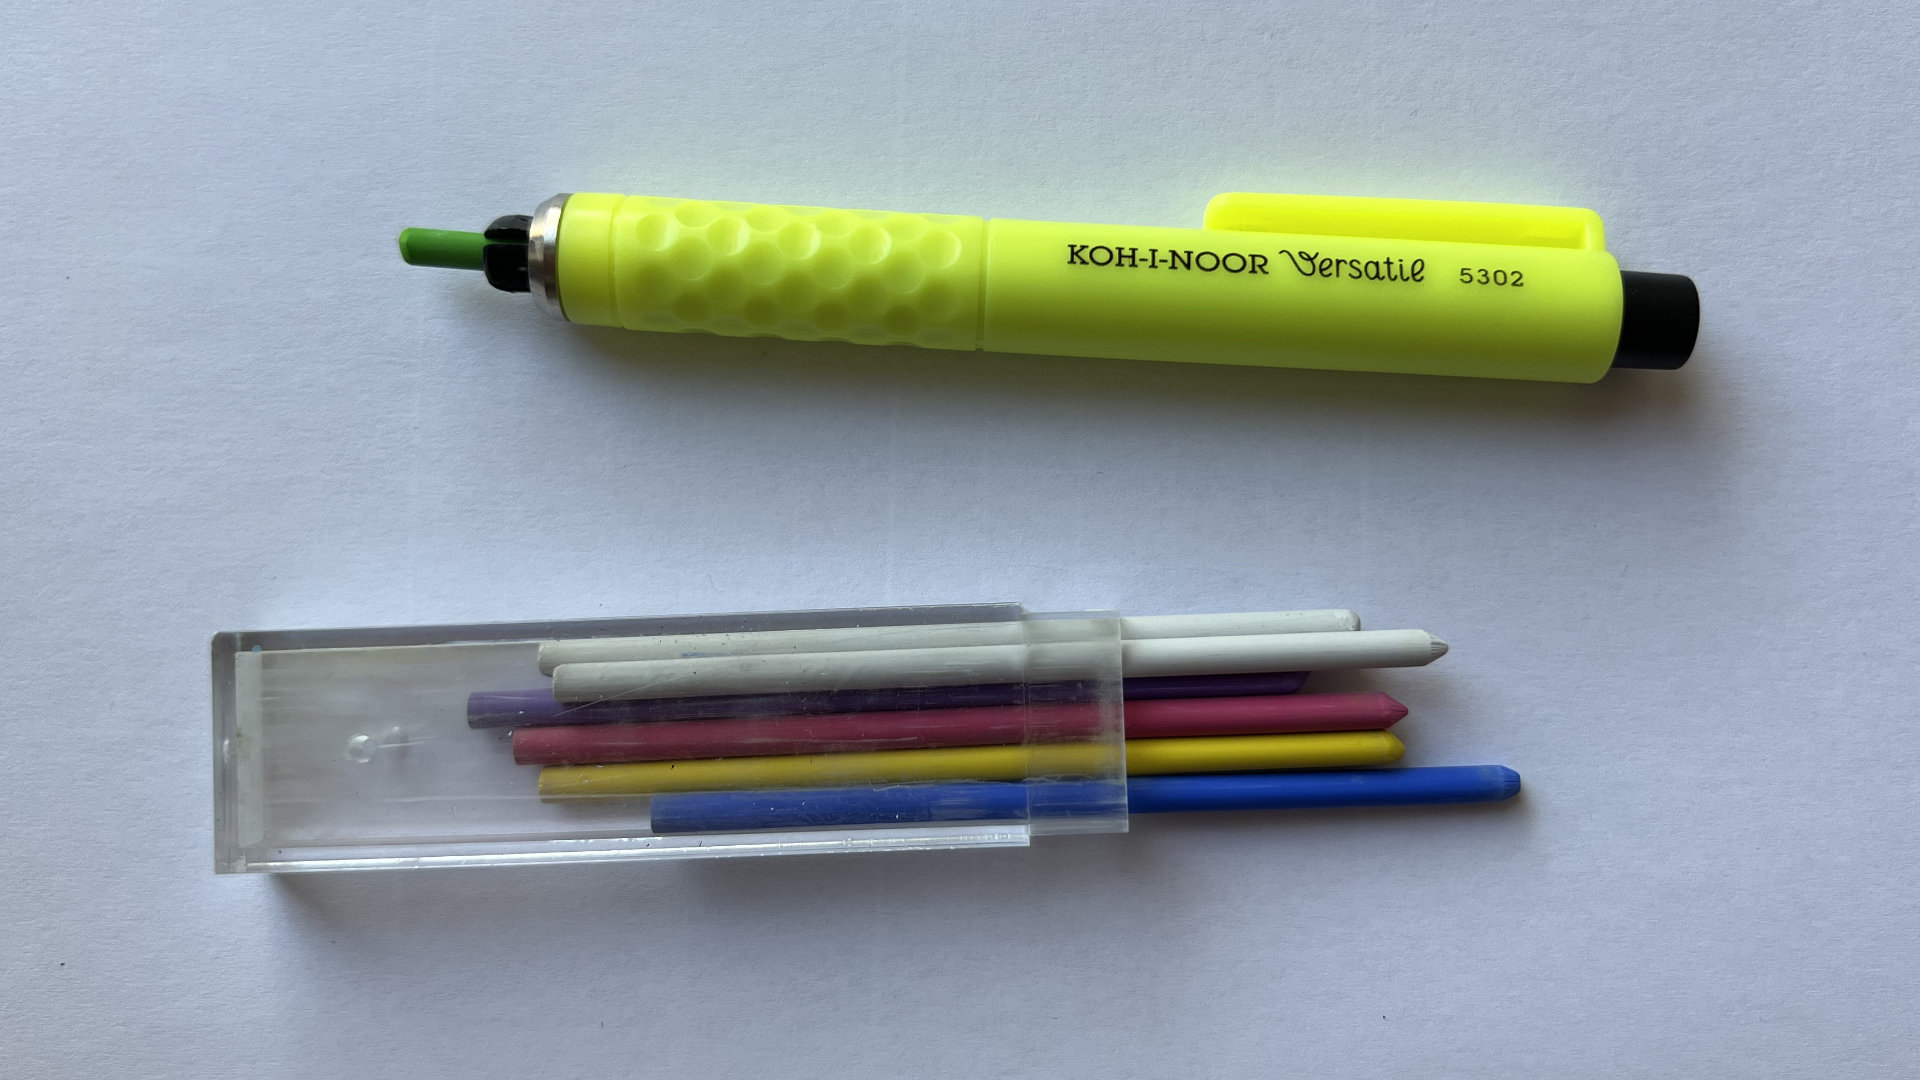
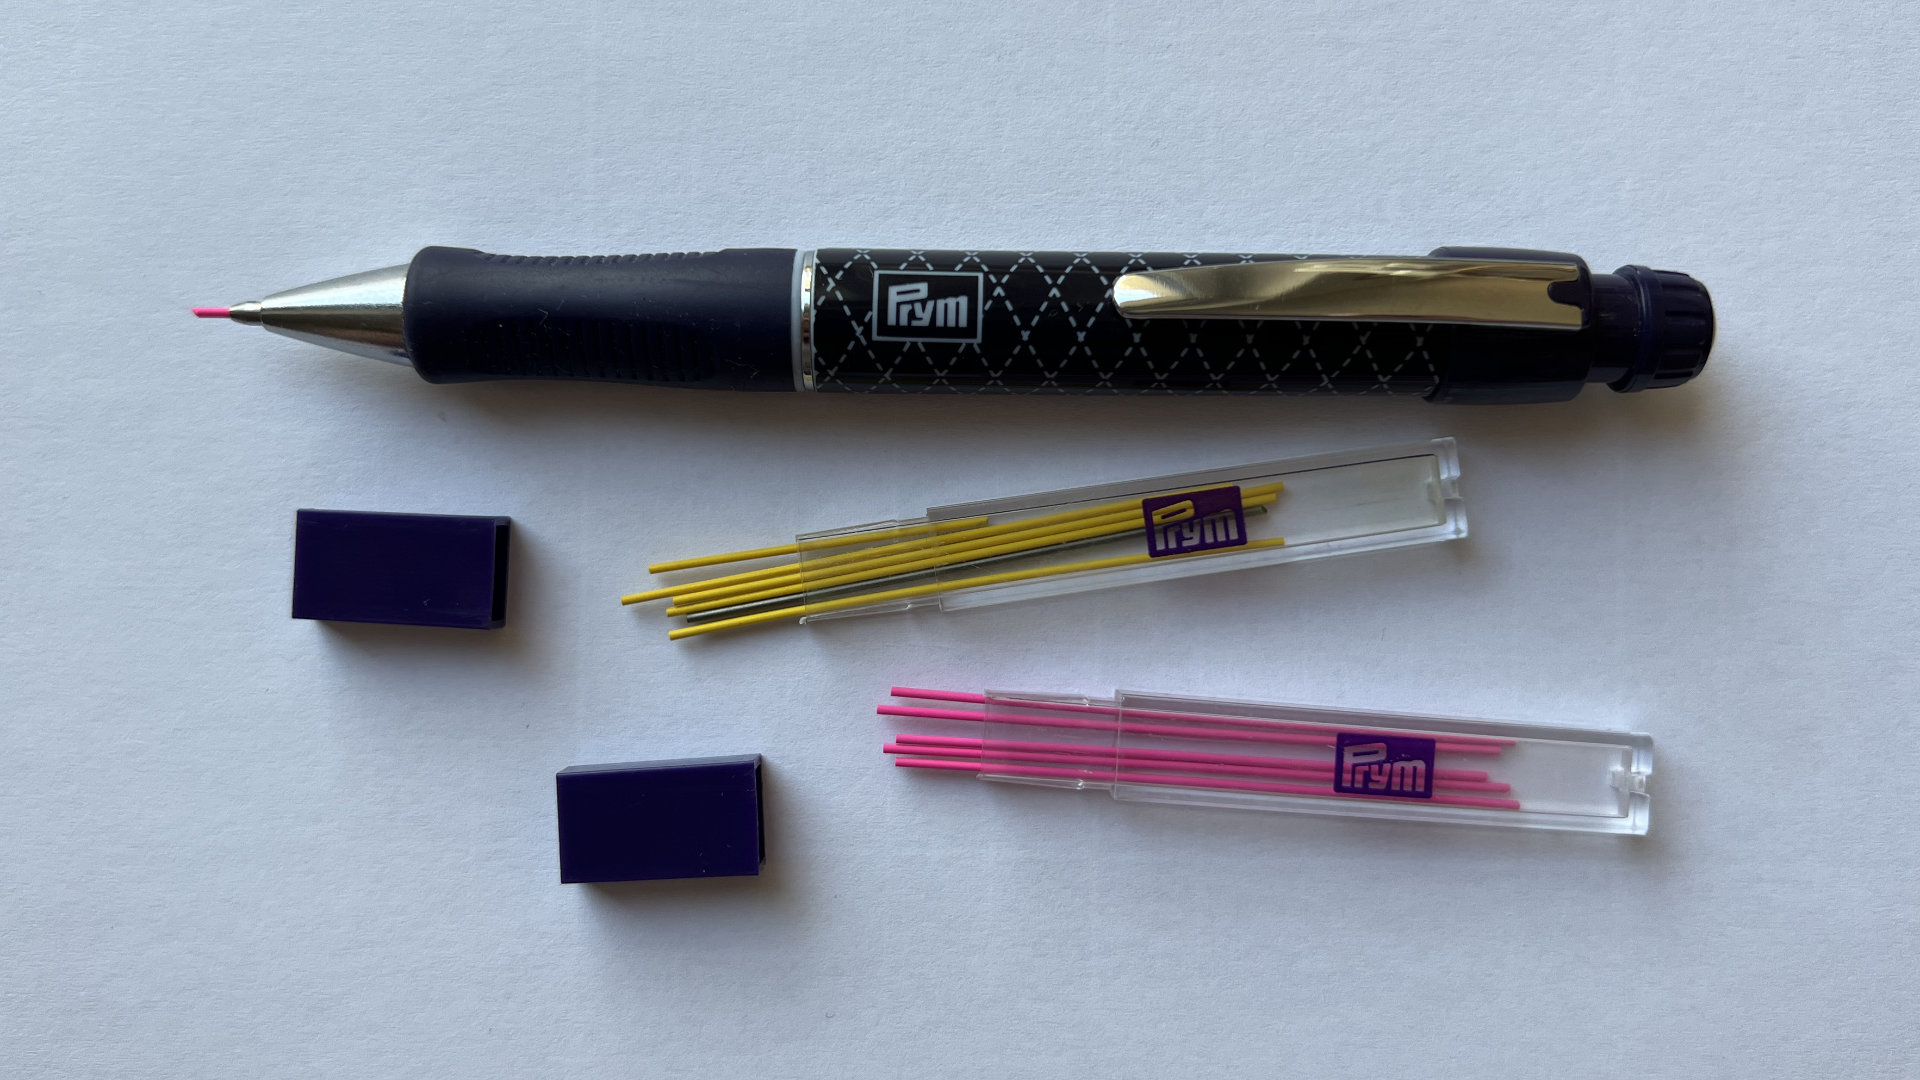
**Best for:** tracing on dark fabric **What to do:** - Put the paper pattern under the fabric. - Use a window, tablet/phone screen, or light box as your backlight. - Tape pattern + fabric so nothing shifts, then trace with light pressure. **Removal note:** Depends on the marking tool, test first. **Quick tips:** If linen looks dotted/broken, switch to transfer paper or water-soluble stabilizer. Pick one marking tool (test first): **Permanent-ish:** White gel pen (Gelly Roll) **Temporary: **water-soluble white pencil; chalk pencil (Bohin, Prym); Chaco liner pen **Removal note: ** White gel pens are usually permanent; chalk/pencils usually brush off or wash out partially.
Tip: For guaranteed clean removal, prefer a water-soluble stabilizer over direct marking.
Permanent heat transfer
**Best for: **lettering, repeated motifs, when you have an iron and want a quick transfer **What to do:** - Use iron-on transfer paper OR trace your pattern with an iron-on transfer pen/pencil onto tracing paper. - Iron the design onto fabric following the product instructions. **Removal note:** Often permanent, test first.
Tip: Avoid for heirloom pieces if you’re unsure about permanence or removal.
Trace to wash-away stabilizer
**Best for:** dark fabric, high detail, beginners, or when lines must stay visible the entire time **What to do:** - Trace the design onto stick-and-stitch water-soluble stabilizer (e.g., Sulky Printable Sticky Fabri-Solvy, DMC Magic Paper) or onto water-soluble film. - Place it on fabric (sticky helps), stitch through it, then rinse/soak to dissolve. **Removal note:** Wash-away, requires water.
Tip: If your finished piece can’t get wet, use carbon paper instead.
Methods for especially tricky cases
- Dressmaker’s carbon sheets - Freezer paper stencil - Prick-and-pounce
Transfer paper and prick-and-pounce
**Best for: ** textured linen, medium-to-dark fabrics, crisp lines without needing light to shine through **What to do:** - Layer: paper pattern on top, then transfer paper (coated/shiny side down), then fabric on bottom. - Tape all layers, then trace with a stylus/empty pen using light pressure. - For dark fabric, use white/yellow transfer paper. **Removal note:** Not always fully removable; different brands behave differently. **Prick-and-pounce** - Prick holes in the pattern, - Pounce powder through - Connect dots
Tip: If you need guaranteed removal, choose water-soluble stabilizer instead.
Marking Tools Library
Transfer troubleshooting
- My line disappeared mid-project. Now what?
- Re-mark only the small section you’re about to stitch. Don’t redraw the entire pattern mid-way, just refresh what you need. If this keeps happening, switch to a method that stays visible longer (water-soluble stabilizer is the easiest fix).
- My transfer won’t come out. Did I ruin it?
- Not necessarily. First, stop rubbing. Rubbing can set pigment deeper into fibers. Try gentle soaking (or the product’s recommended removal method). Remember: many marks sit under stitches and won’t show in the finished piece.
- My linen is too textured to trace cleanly.
- Use transfer paper or a water-soluble stabilizer. Linen texture is beautiful, but it’s not the easiest surface for backlight tracing or ultra-fine pen lines.
- I don’t have a lightbox. What works?
- A bright window in daytime is the simplest no-device option. The tablet method is the easiest: full brightness + tape everything. For small motifs, a phone flashlight under glass also works well.
- My transfer smudged while tracing.
- Use less pressure, and add a clean sheet of paper under your hand. Work from one side to the other, and avoid resting your palm directly on freshly transferred areas.
- How do I transfer to dark fabric?
- Switch methods. For dark fabric, the most reliable choices are white transfer paper or water-soluble stabilizer. If you must draw directly, test a white pencil or chalk pencil first and keep lines light.
- My printed lines are showing/I can’t remove them
- That’s expected. Inkjet printing is a permanent transfer. Use it when your stitches will cover the lines, or switch to printable wash-away stabilizer when you want removal.